Trezor Guide
How to sign a message with your Trezor
A step-by-step guide for signing a Bitcoin message with your Trezor during the Bitsurance registration flow.
To prove that you own the wallet you want to insure, we need a signature from you. This confirms that you control the submitted account. The signature only takes a few minutes and does not give Bitsurance access to your Bitcoin.
This guide shows you how to sign a message with your Trezor.
Prepare Trezor Suite
- Connect your Trezor to your computer.
- Open Trezor Suite and unlock your Trezor.
- Select the Bitcoin account you want to insure.
- Open the Sign & Verify tab. In Trezor Suite, this option is located behind the additional options menu.
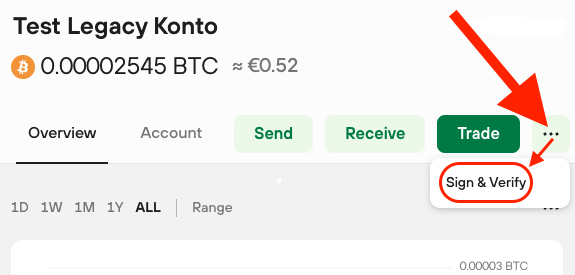
Open Sign & Verify in the Bitcoin account you use for Bitsurance.
Sign the message
- Copy the text shown in the Bitsurance registration flow.
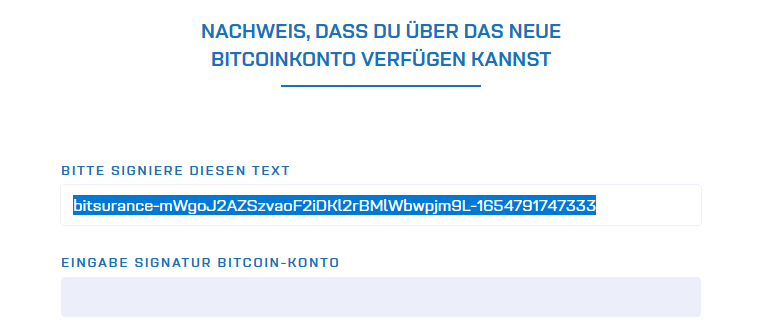
Copy the exact Bitsurance text shown on screen. This is the message you will sign.
- Paste the text into Sign message in Trezor Suite.
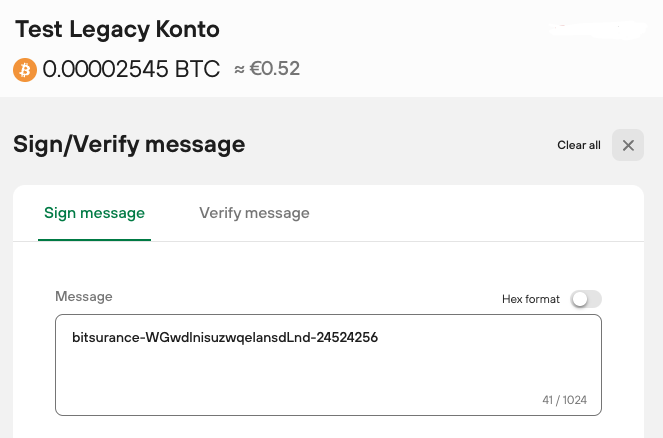
Paste the Bitsurance message into the Sign message field.
- Under Address, select the first fresh address.

Use the first address of the insured Bitcoin account.
- Click Sign and confirm the process on your Trezor.
- Copy the generated signature and paste it into the signature field at Bitsurance.
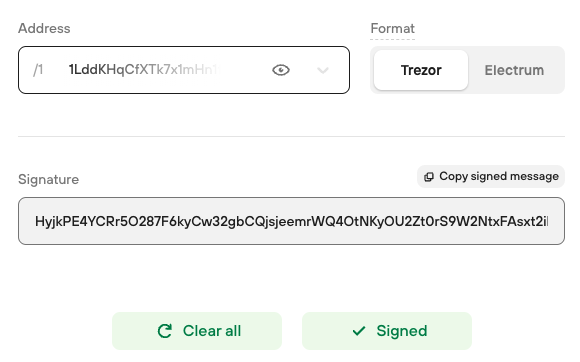
Copy the complete signature back into the Bitsurance registration flow.
That's it. You have proven that you control the Bitcoin account without revealing private keys or seed words.