BitBox02 Guide
How to create an additional account on your BitBox02
A step-by-step guide for creating a dedicated Bitcoin account for your insured coins in the BitBoxApp.
If you only want to insure part of your coins, or if you want to keep the privacy of your main wallet, you can create an additional account on your BitBox02 for the coins you want to insure.
Bitsurance currently only insures coins on Native SegWit addresses. In some cases you may need to send your coins to a new address in the BitBoxApp. To make sure all insured coins are clearly assigned, we generally recommend using a dedicated account for Bitsurance.
Add an account
- Open the BitBoxApp and unlock your BitBox02. If you are using the BitBox02 on this computer for the first time, confirm the pairing code.
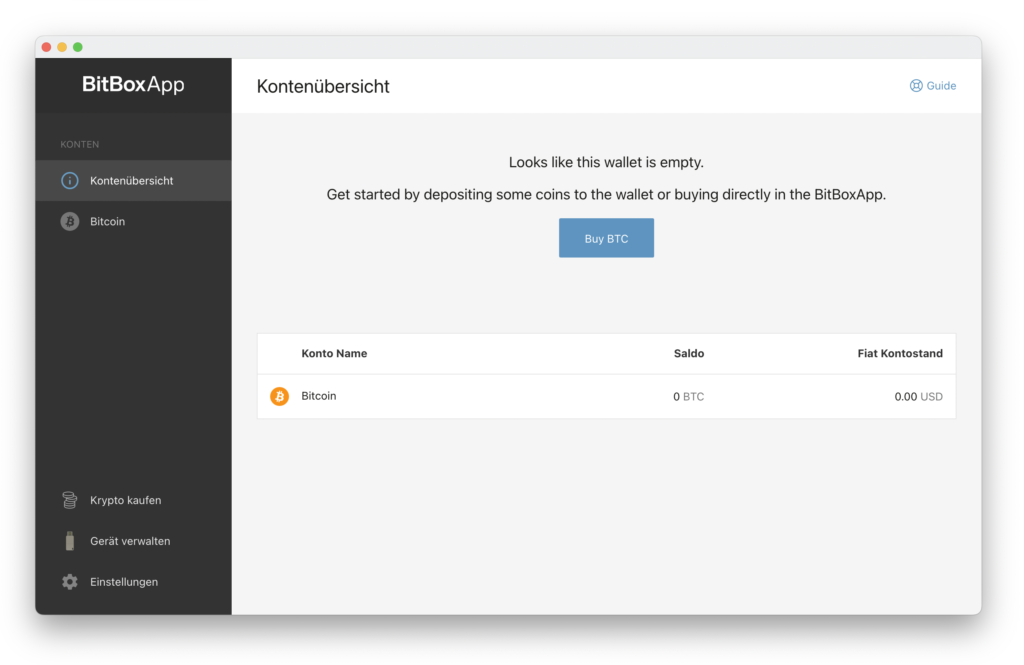
Start in the BitBoxApp with your BitBox02 unlocked.
- Click Settings in the lower-left corner.
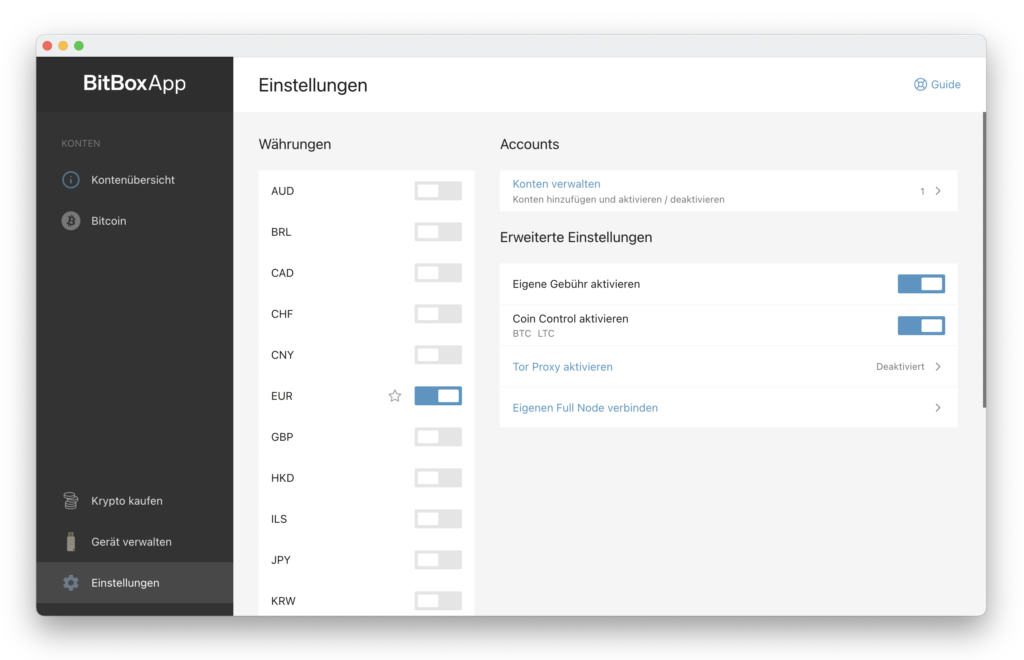
You can access account management through Settings.
- Select Manage accounts.
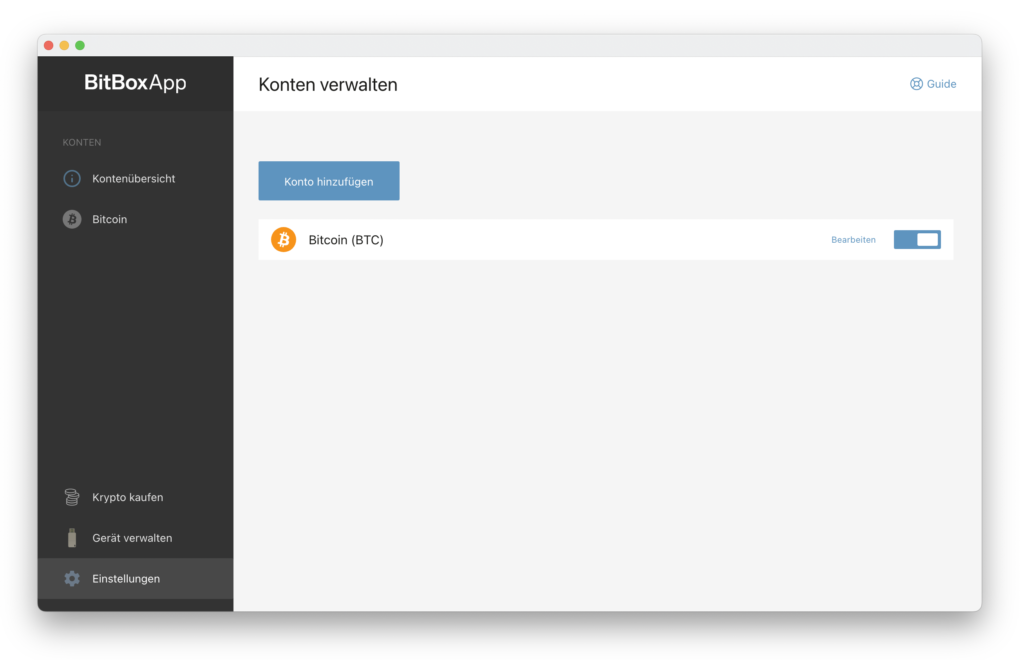
This is where you add another Bitcoin account.
- Click Add account.
- Choose a name for the account and confirm with Add account.

A clear name such as Bitsurance helps you find the account later.
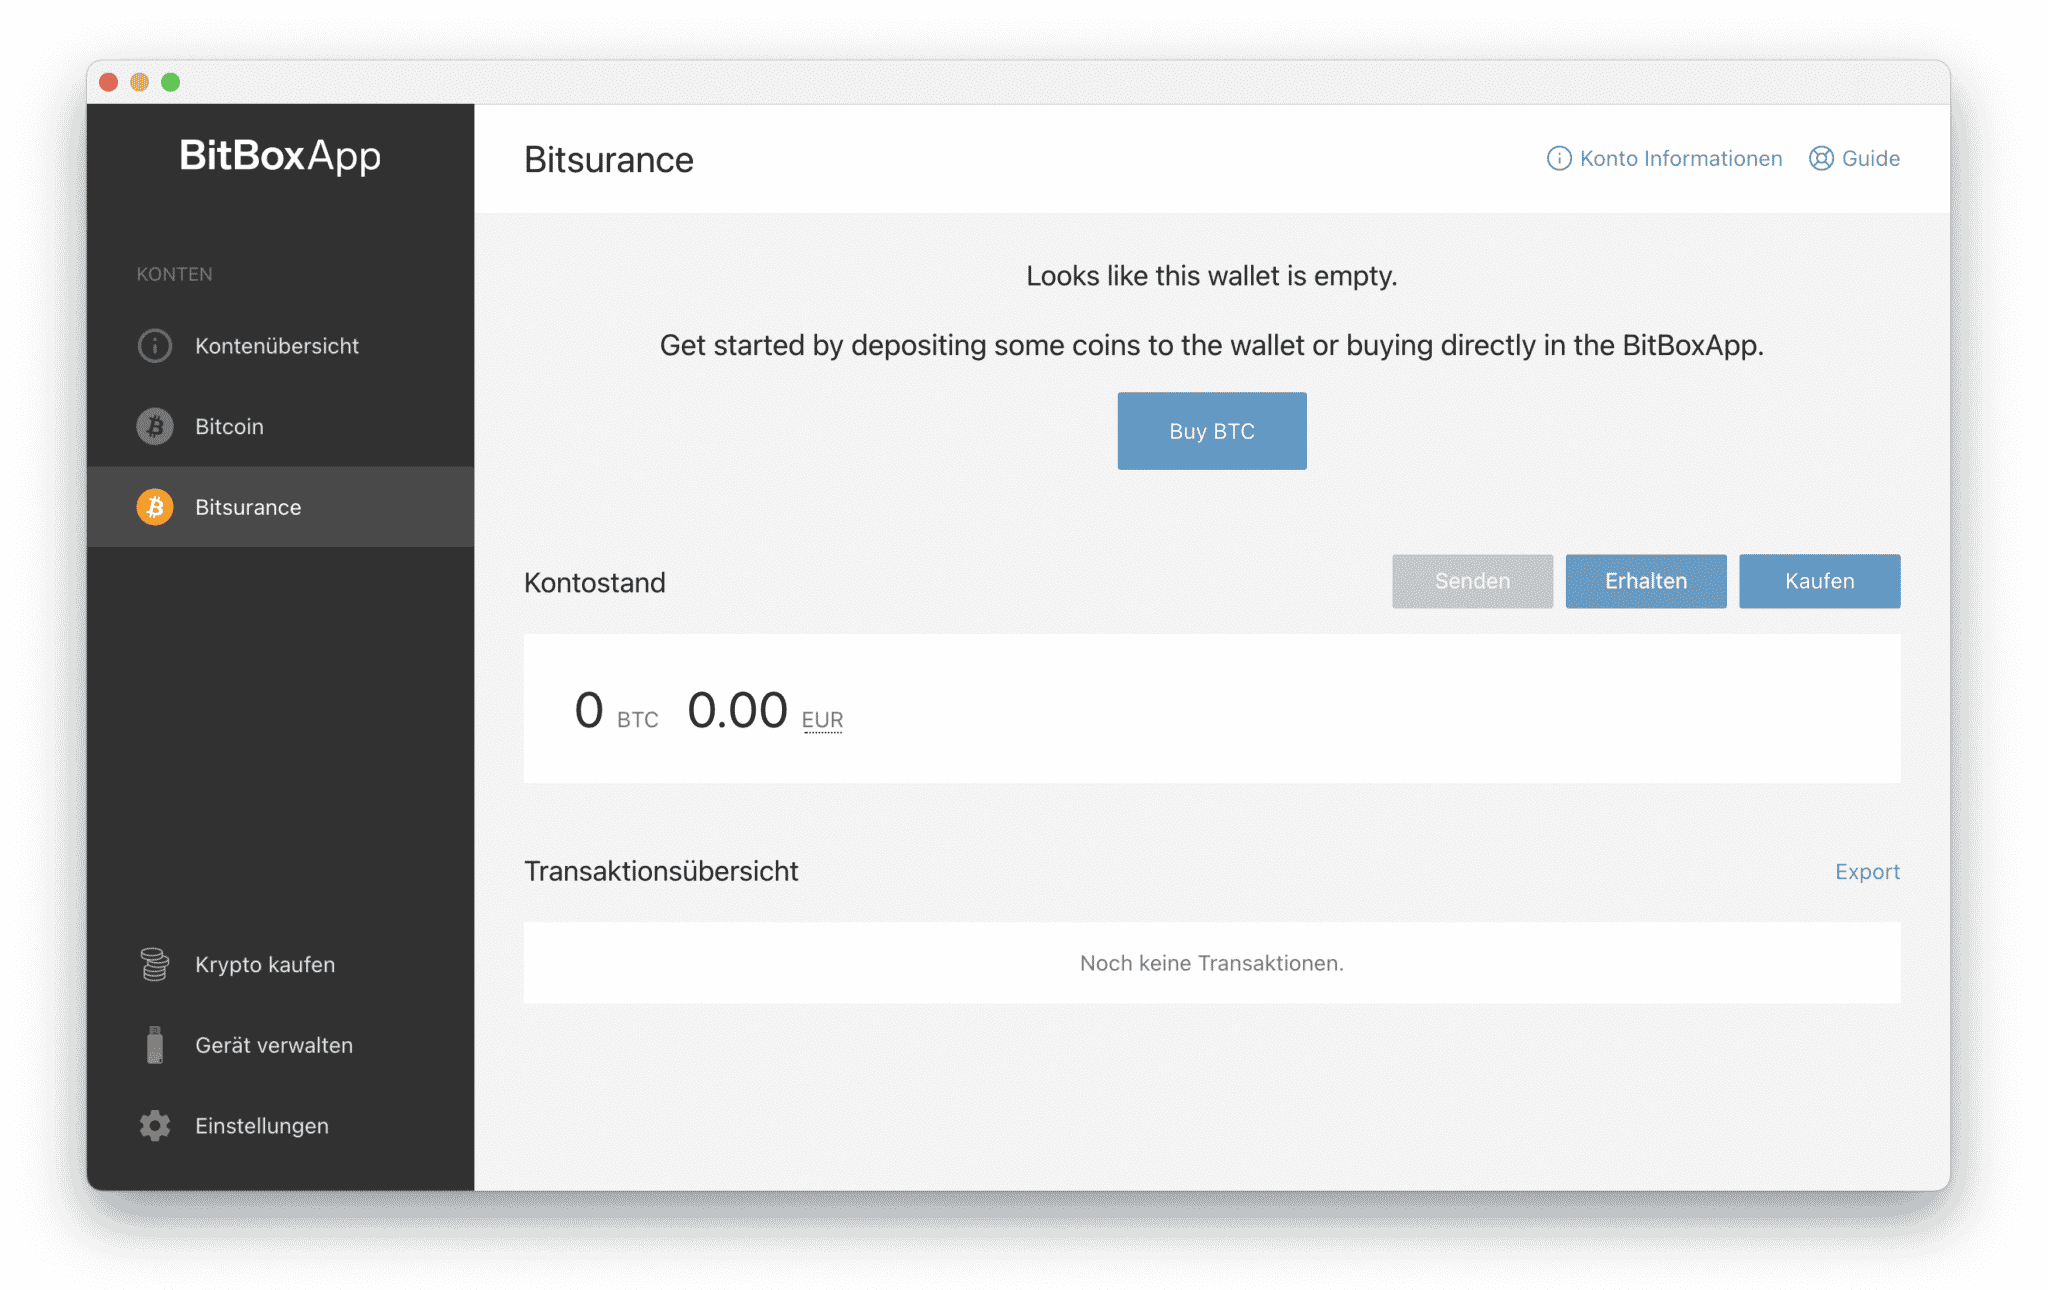
- The account has been added and can now be selected in the left sidebar.

After setup, the new account appears in your account list.
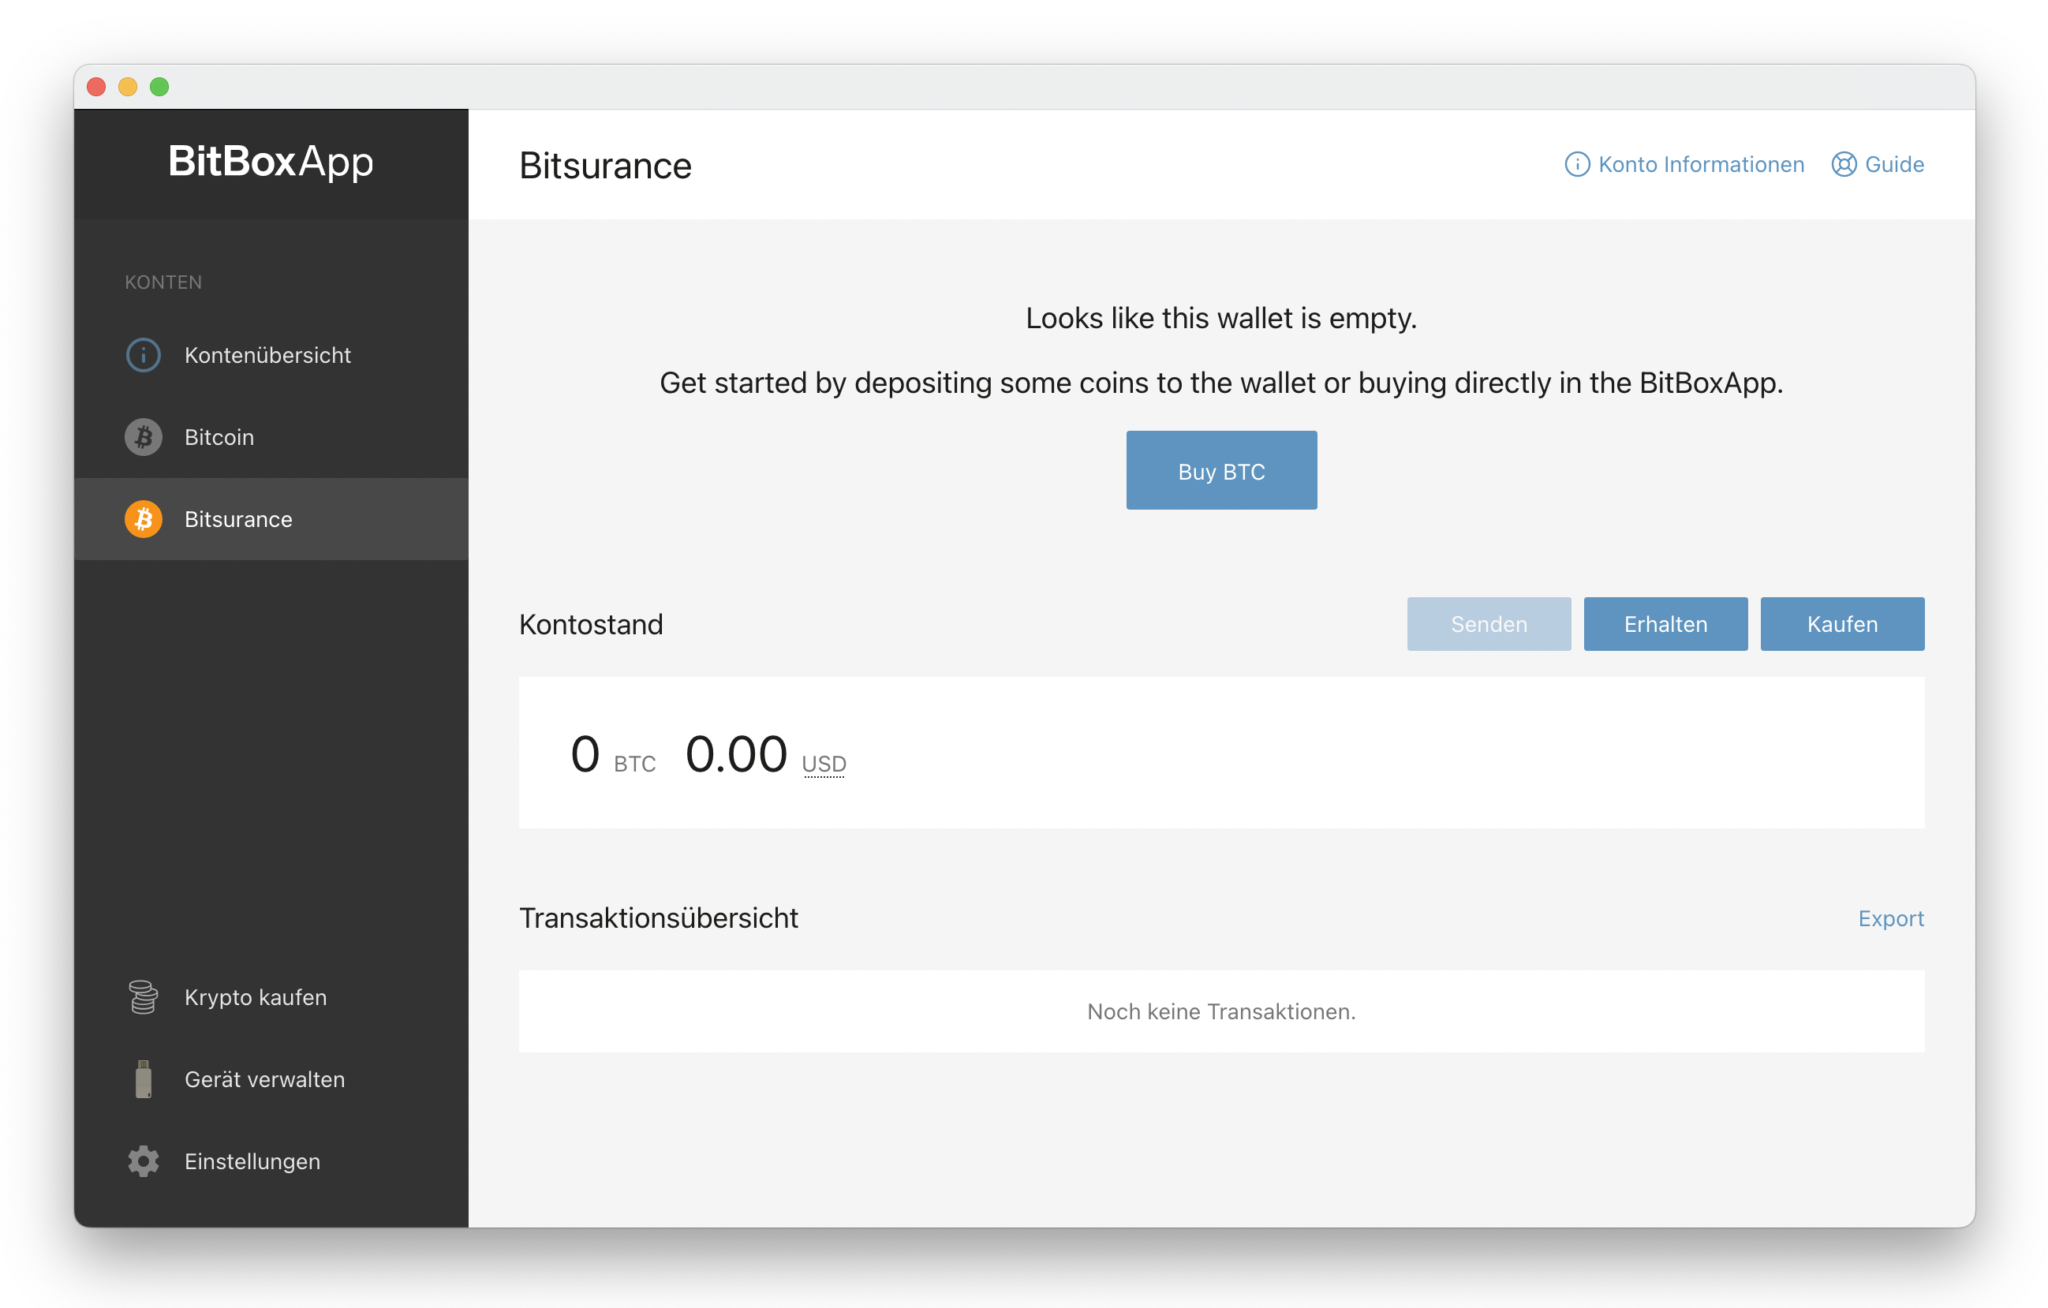
Select the new account before creating a receiving address.
Transfer coins
- In the new account, click Receive to create a new Bitcoin address and show it on your BitBox02.
Create the receiving address in the newly added account.
- Check that the address starts with bc1q, copy the address, and remember the last characters.
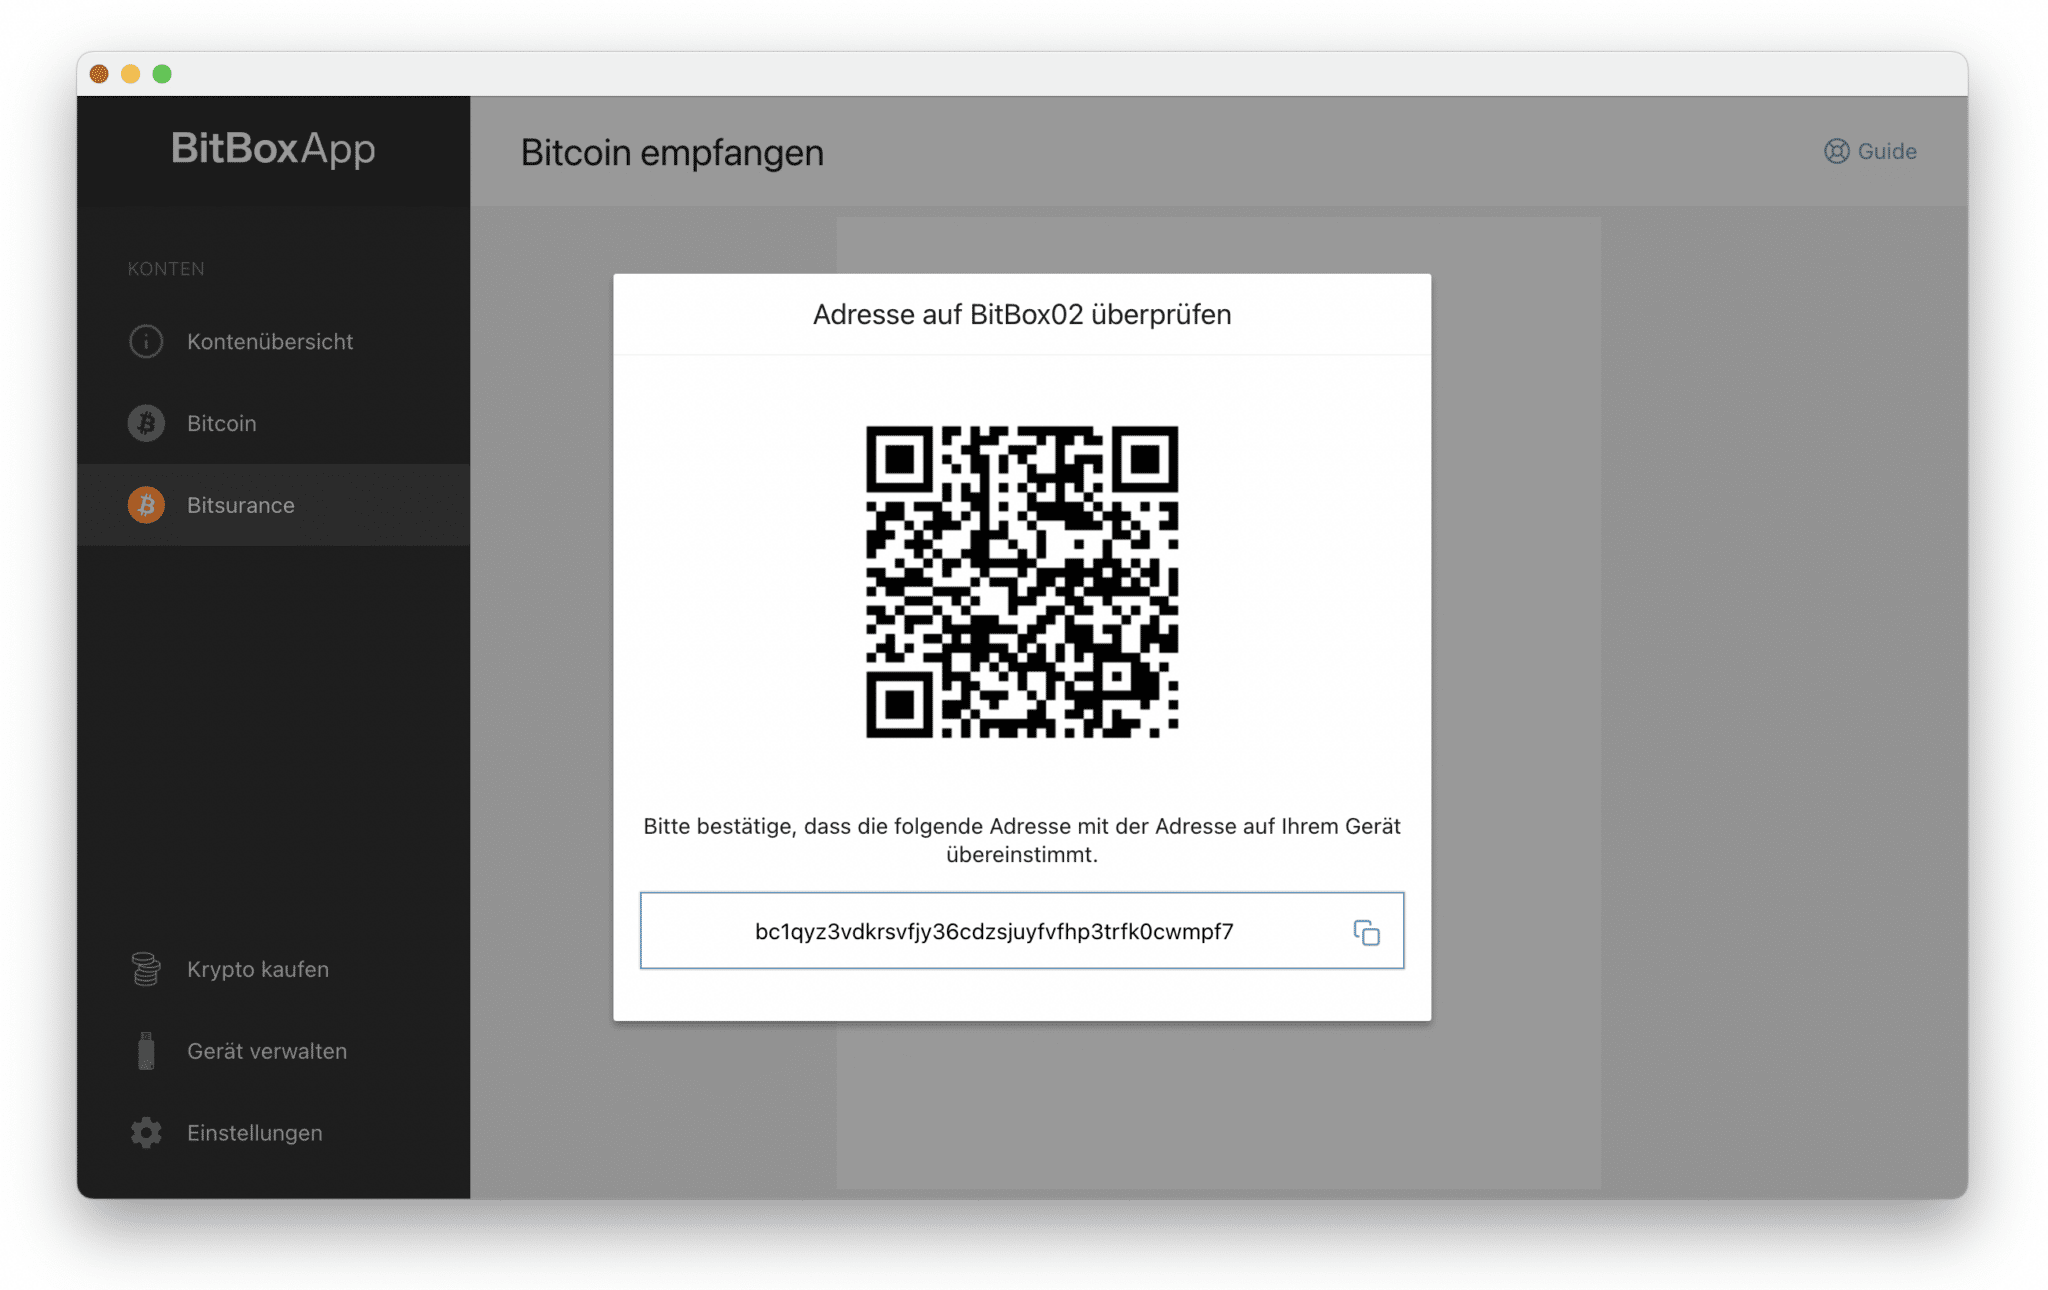
Compare the address in the app with the address shown on your BitBox02.
- Switch back to your old account and click Send to send a transaction to the copied address. If you want to transfer your full Bitcoin balance, you can enable Send all.
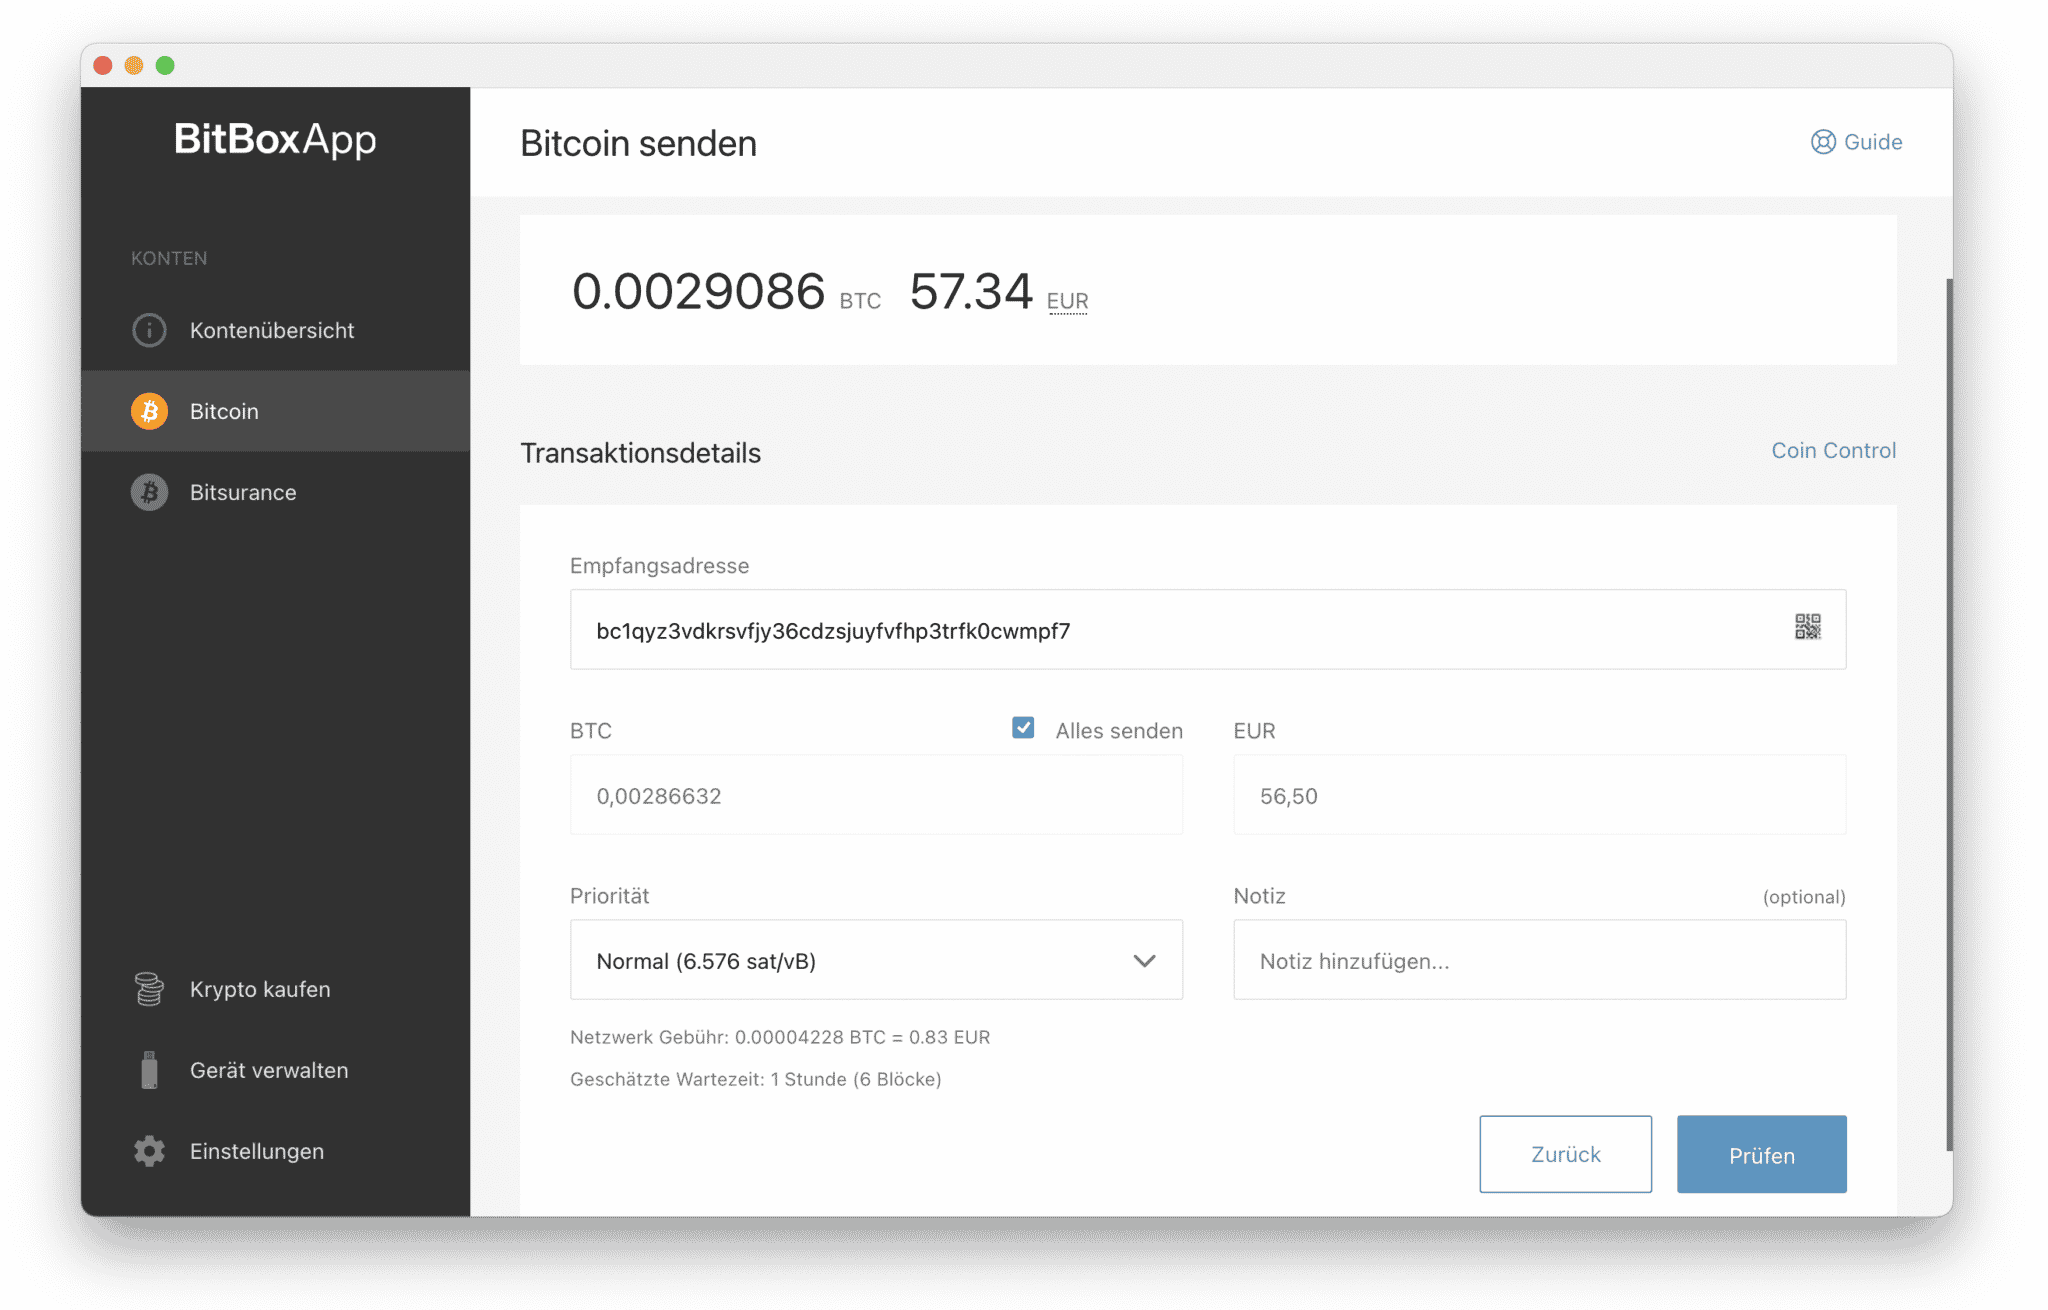
Send the coins from the old account to the receiving address of the new account.
After about a minute, an incoming transaction should be visible in your Bitsurance account.