Ledger Guide
How to create an additional account on your Ledger
A step-by-step guide for creating an additional Bitcoin account for your insured coins in Ledger Live.
If you only want to insure part of your coins, or if you want to keep the privacy of your main wallet, you can create an additional account in Ledger Live for the coins you want to insure.
Add an account
- Open Ledger Live.
- Select Accounts in the left side of the app.
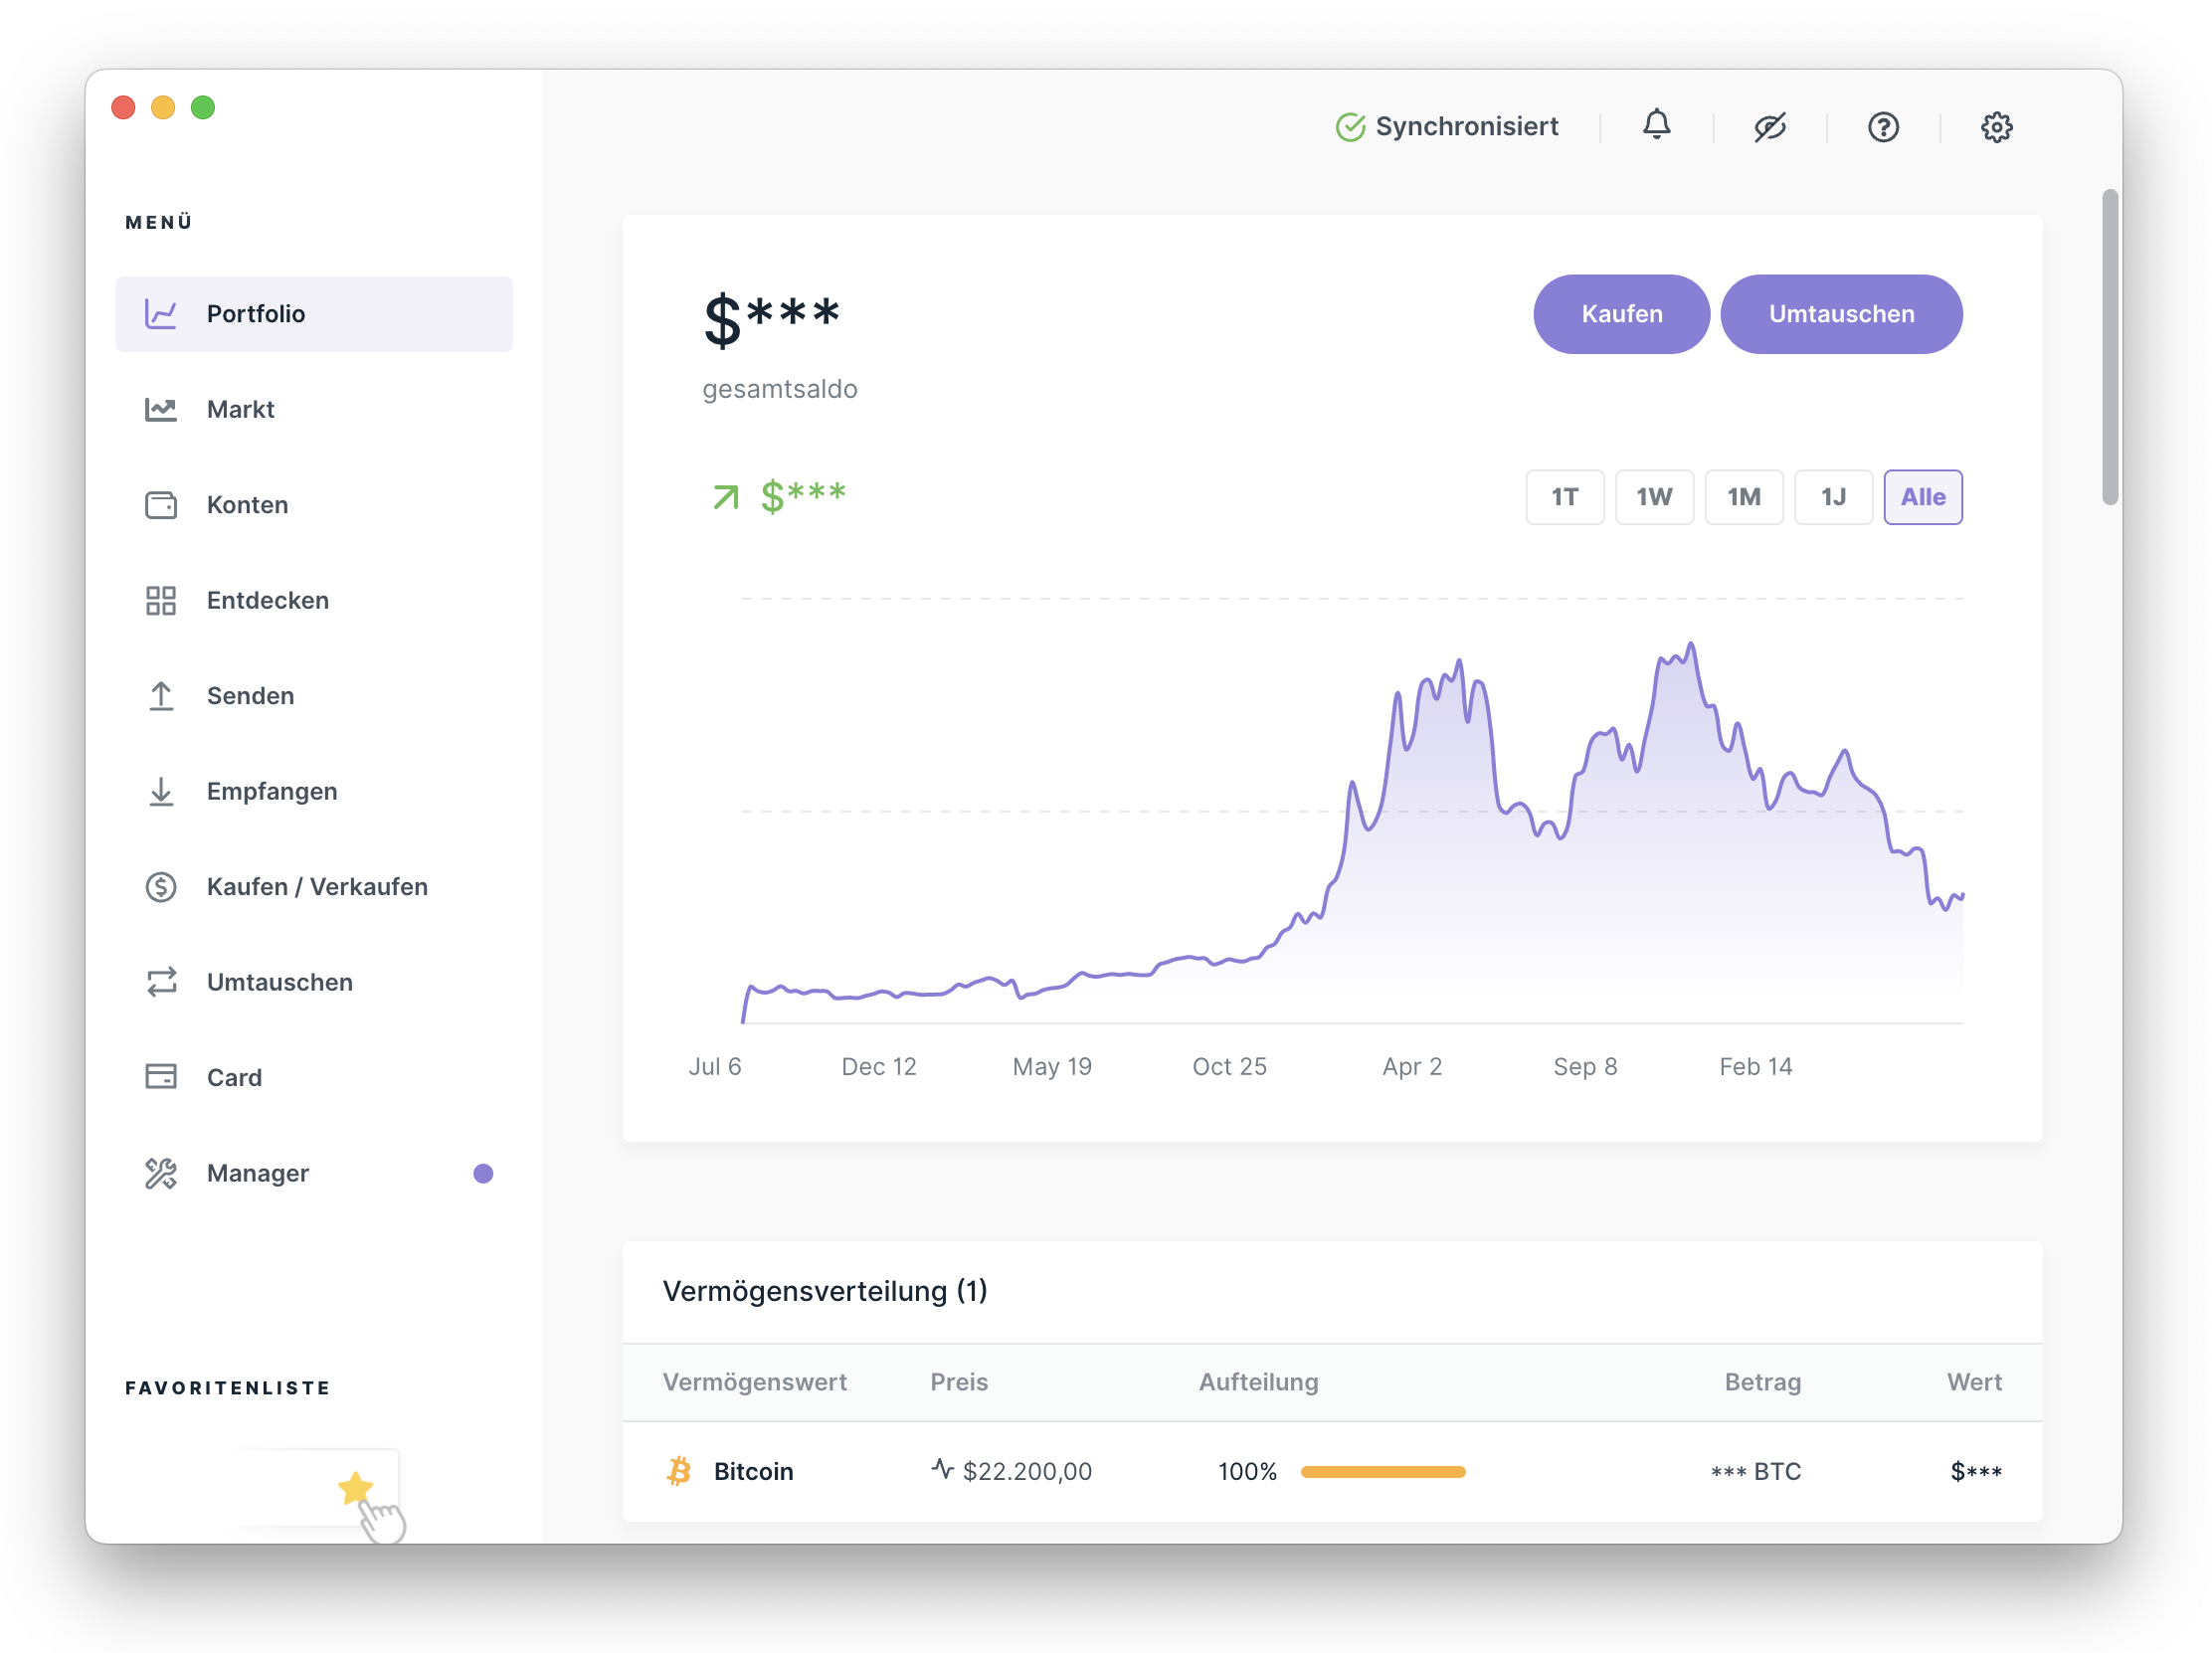
Open Ledger Live and switch to Accounts.
Use the Accounts view to manage existing and new Bitcoin accounts.
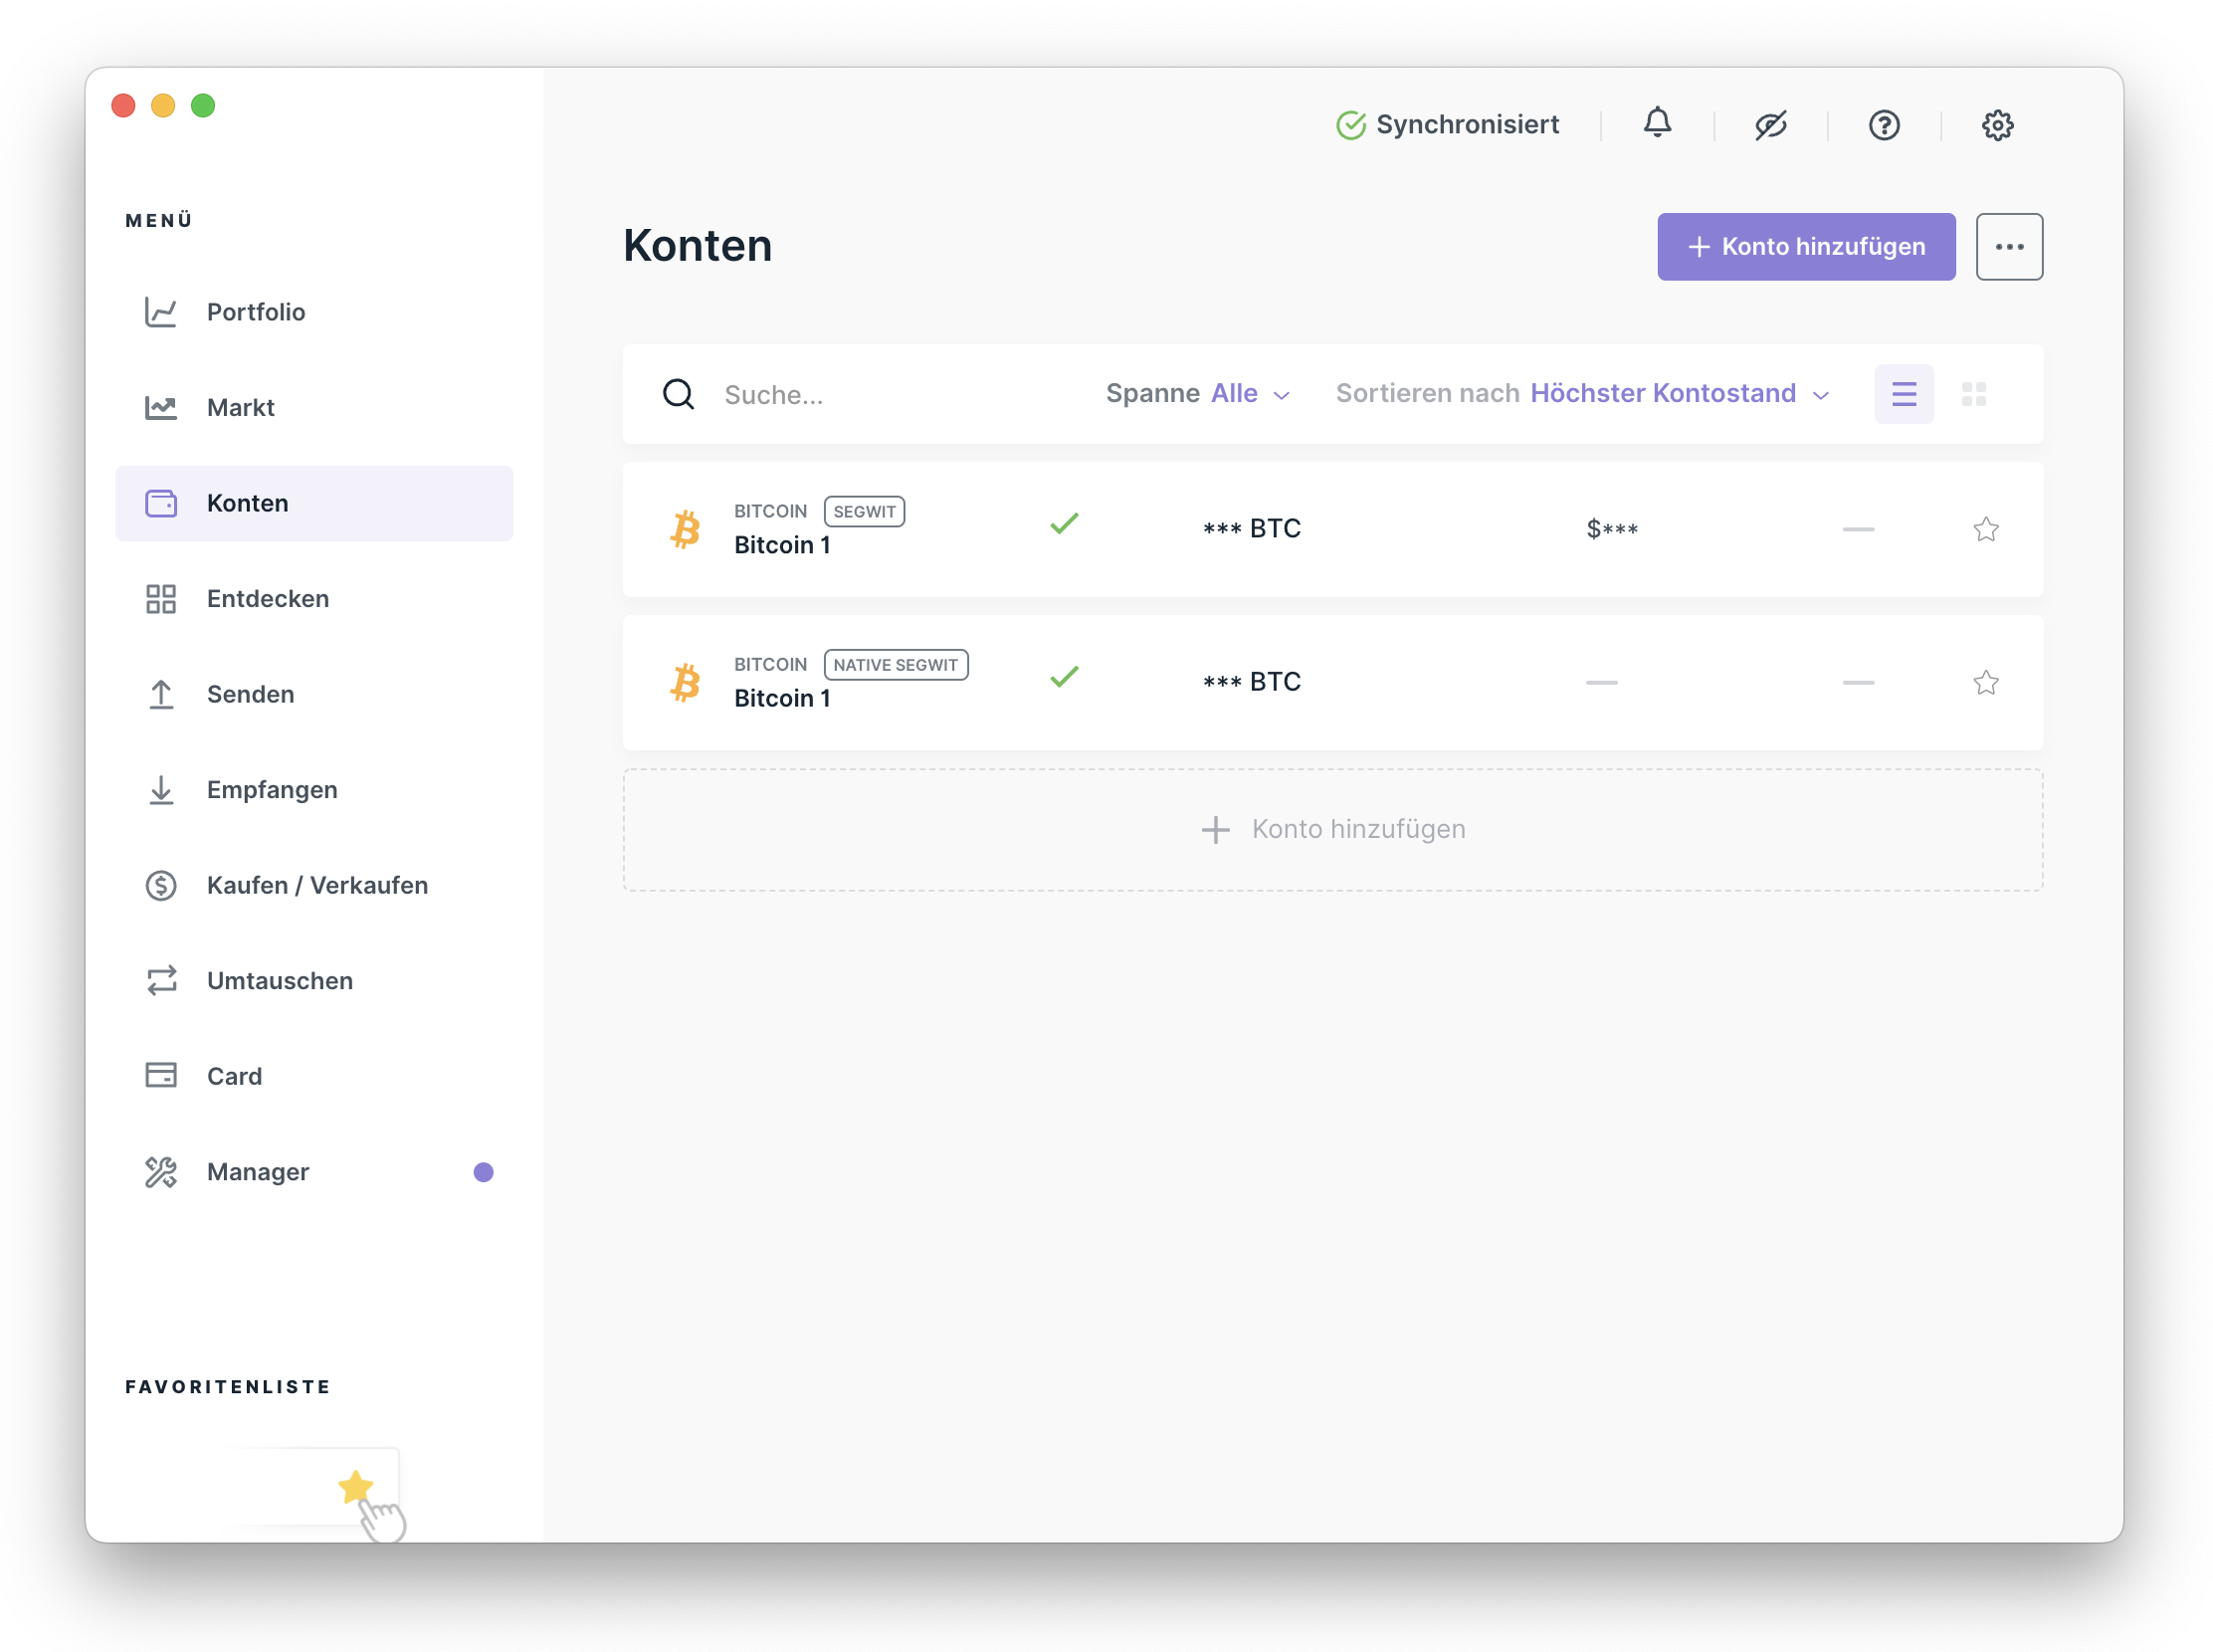
- Click Add account.
Start the assistant for adding a new account.
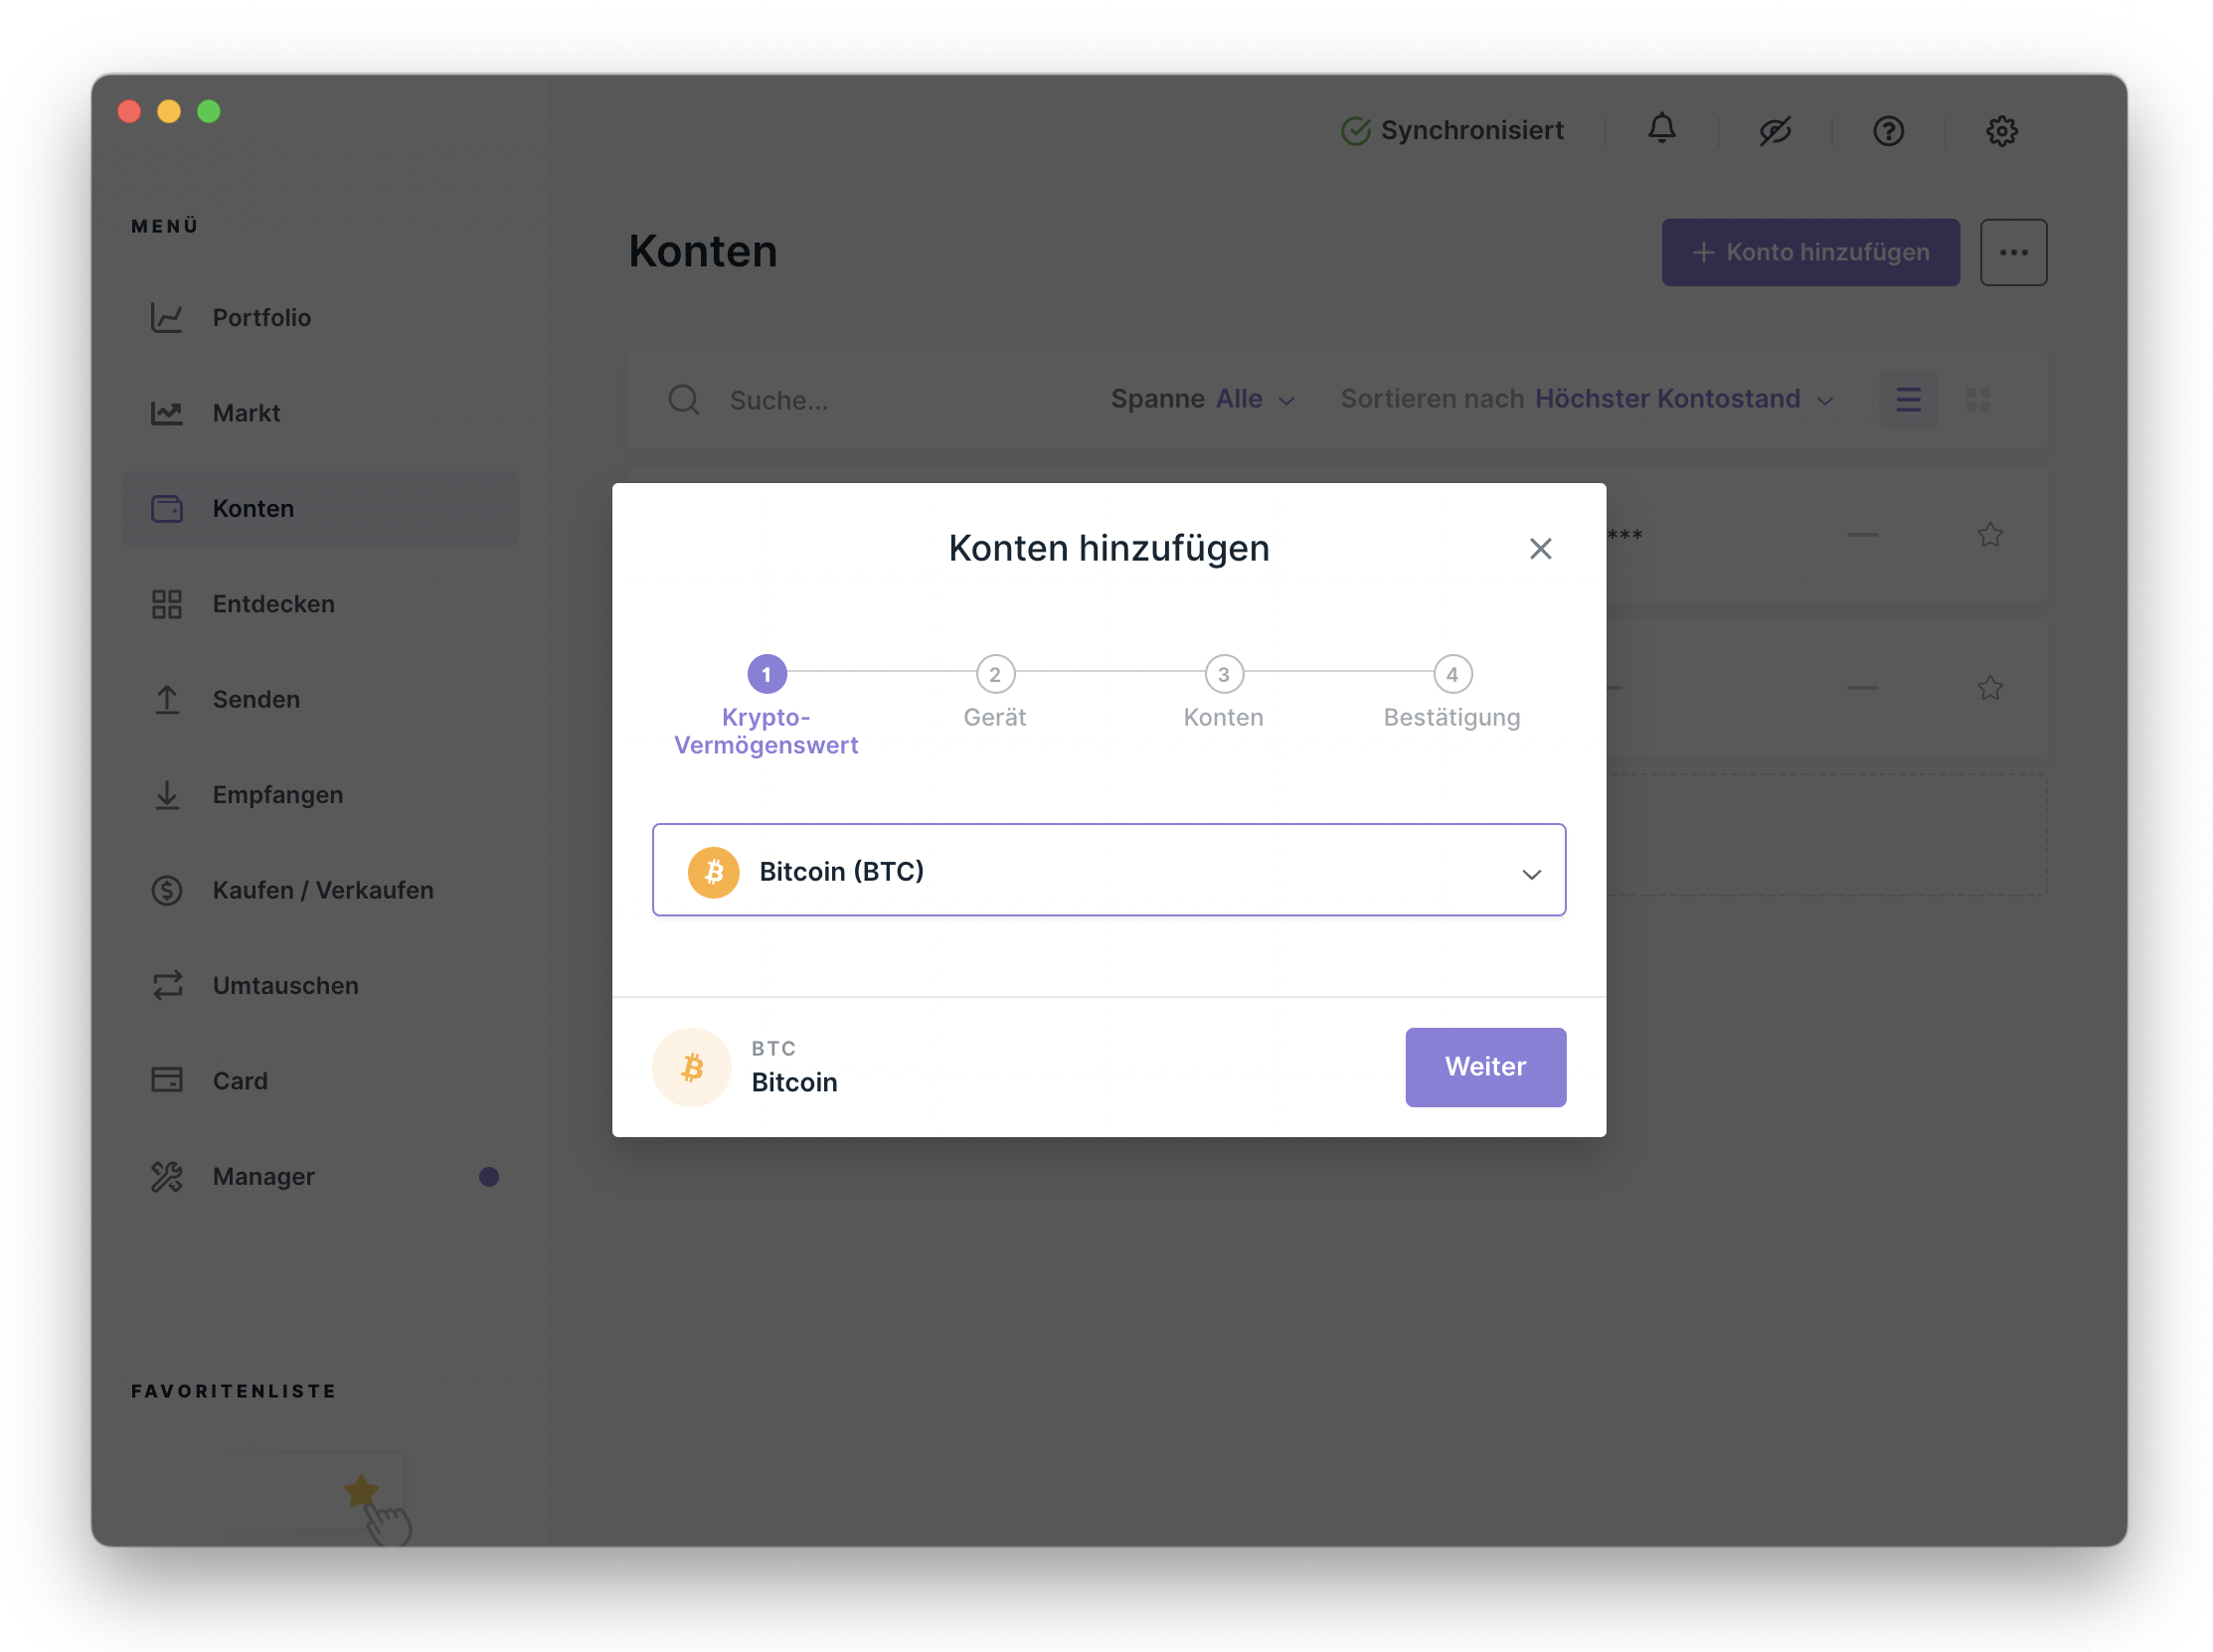
- Select Bitcoin as the account type and confirm with Continue.
Choose Bitcoin as the asset for the new account.
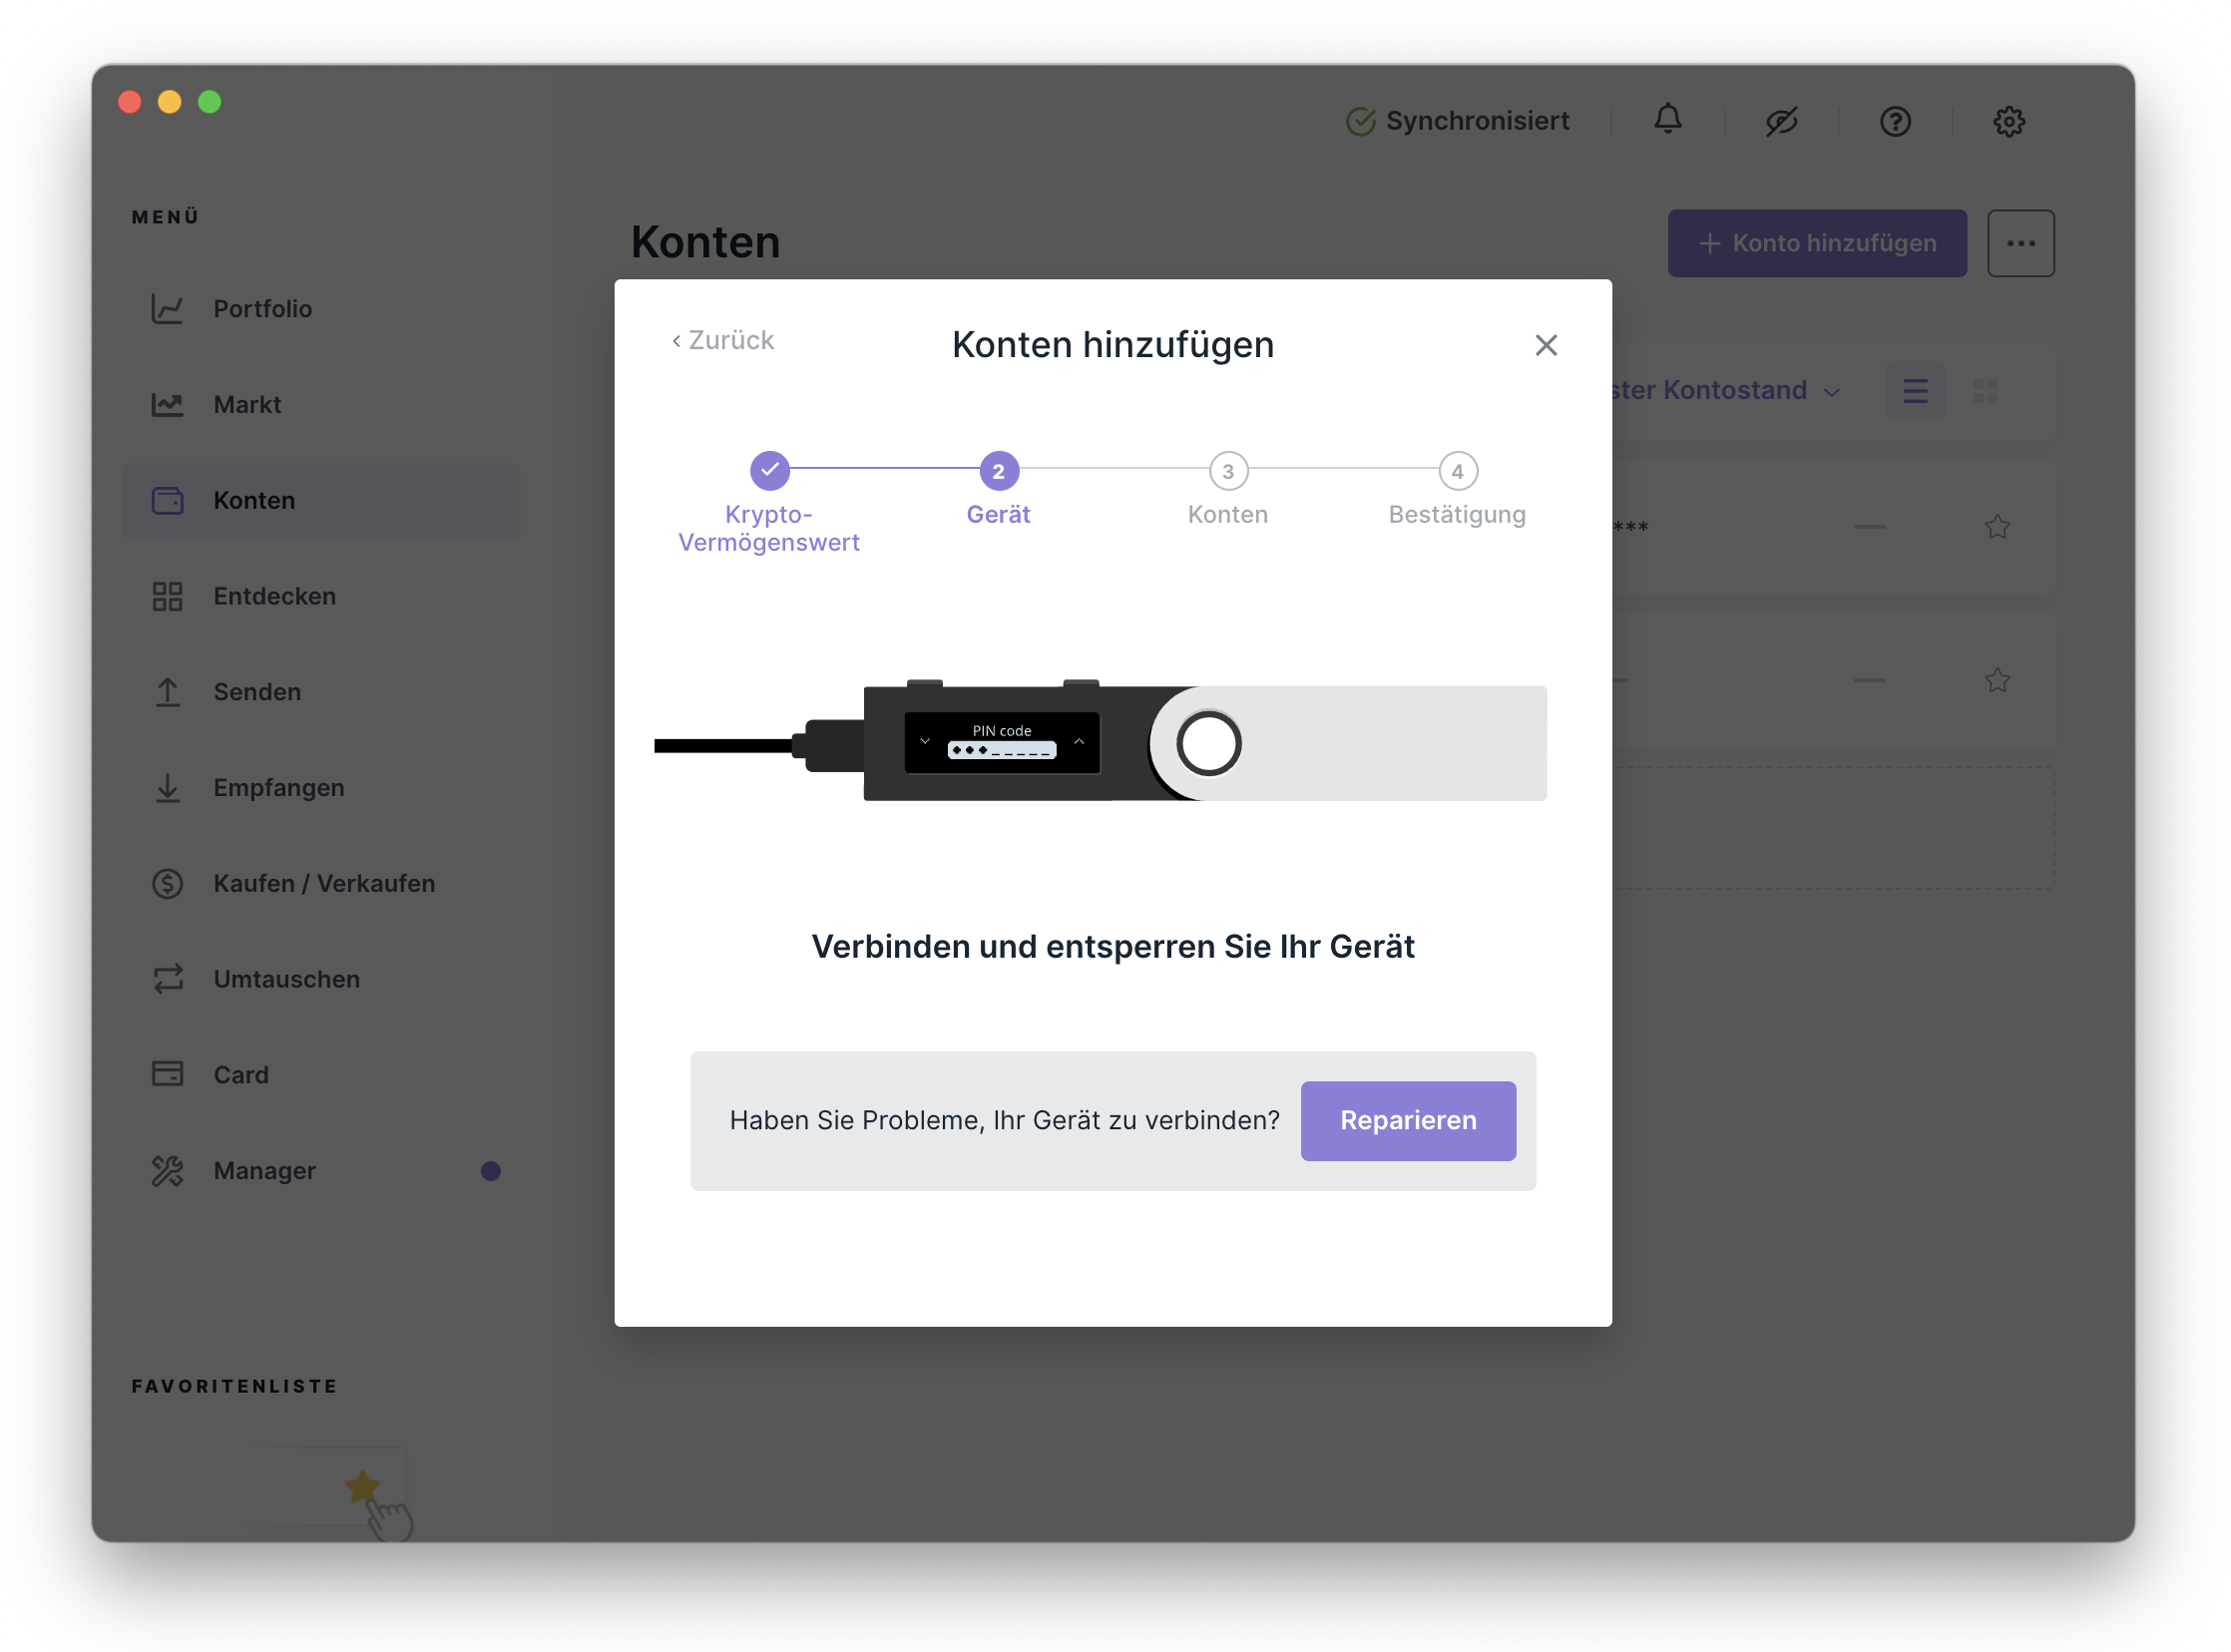
- Connect your Ledger, unlock it, and open the Bitcoin app on the device.
Ledger Live searches for your device and the open Bitcoin app.
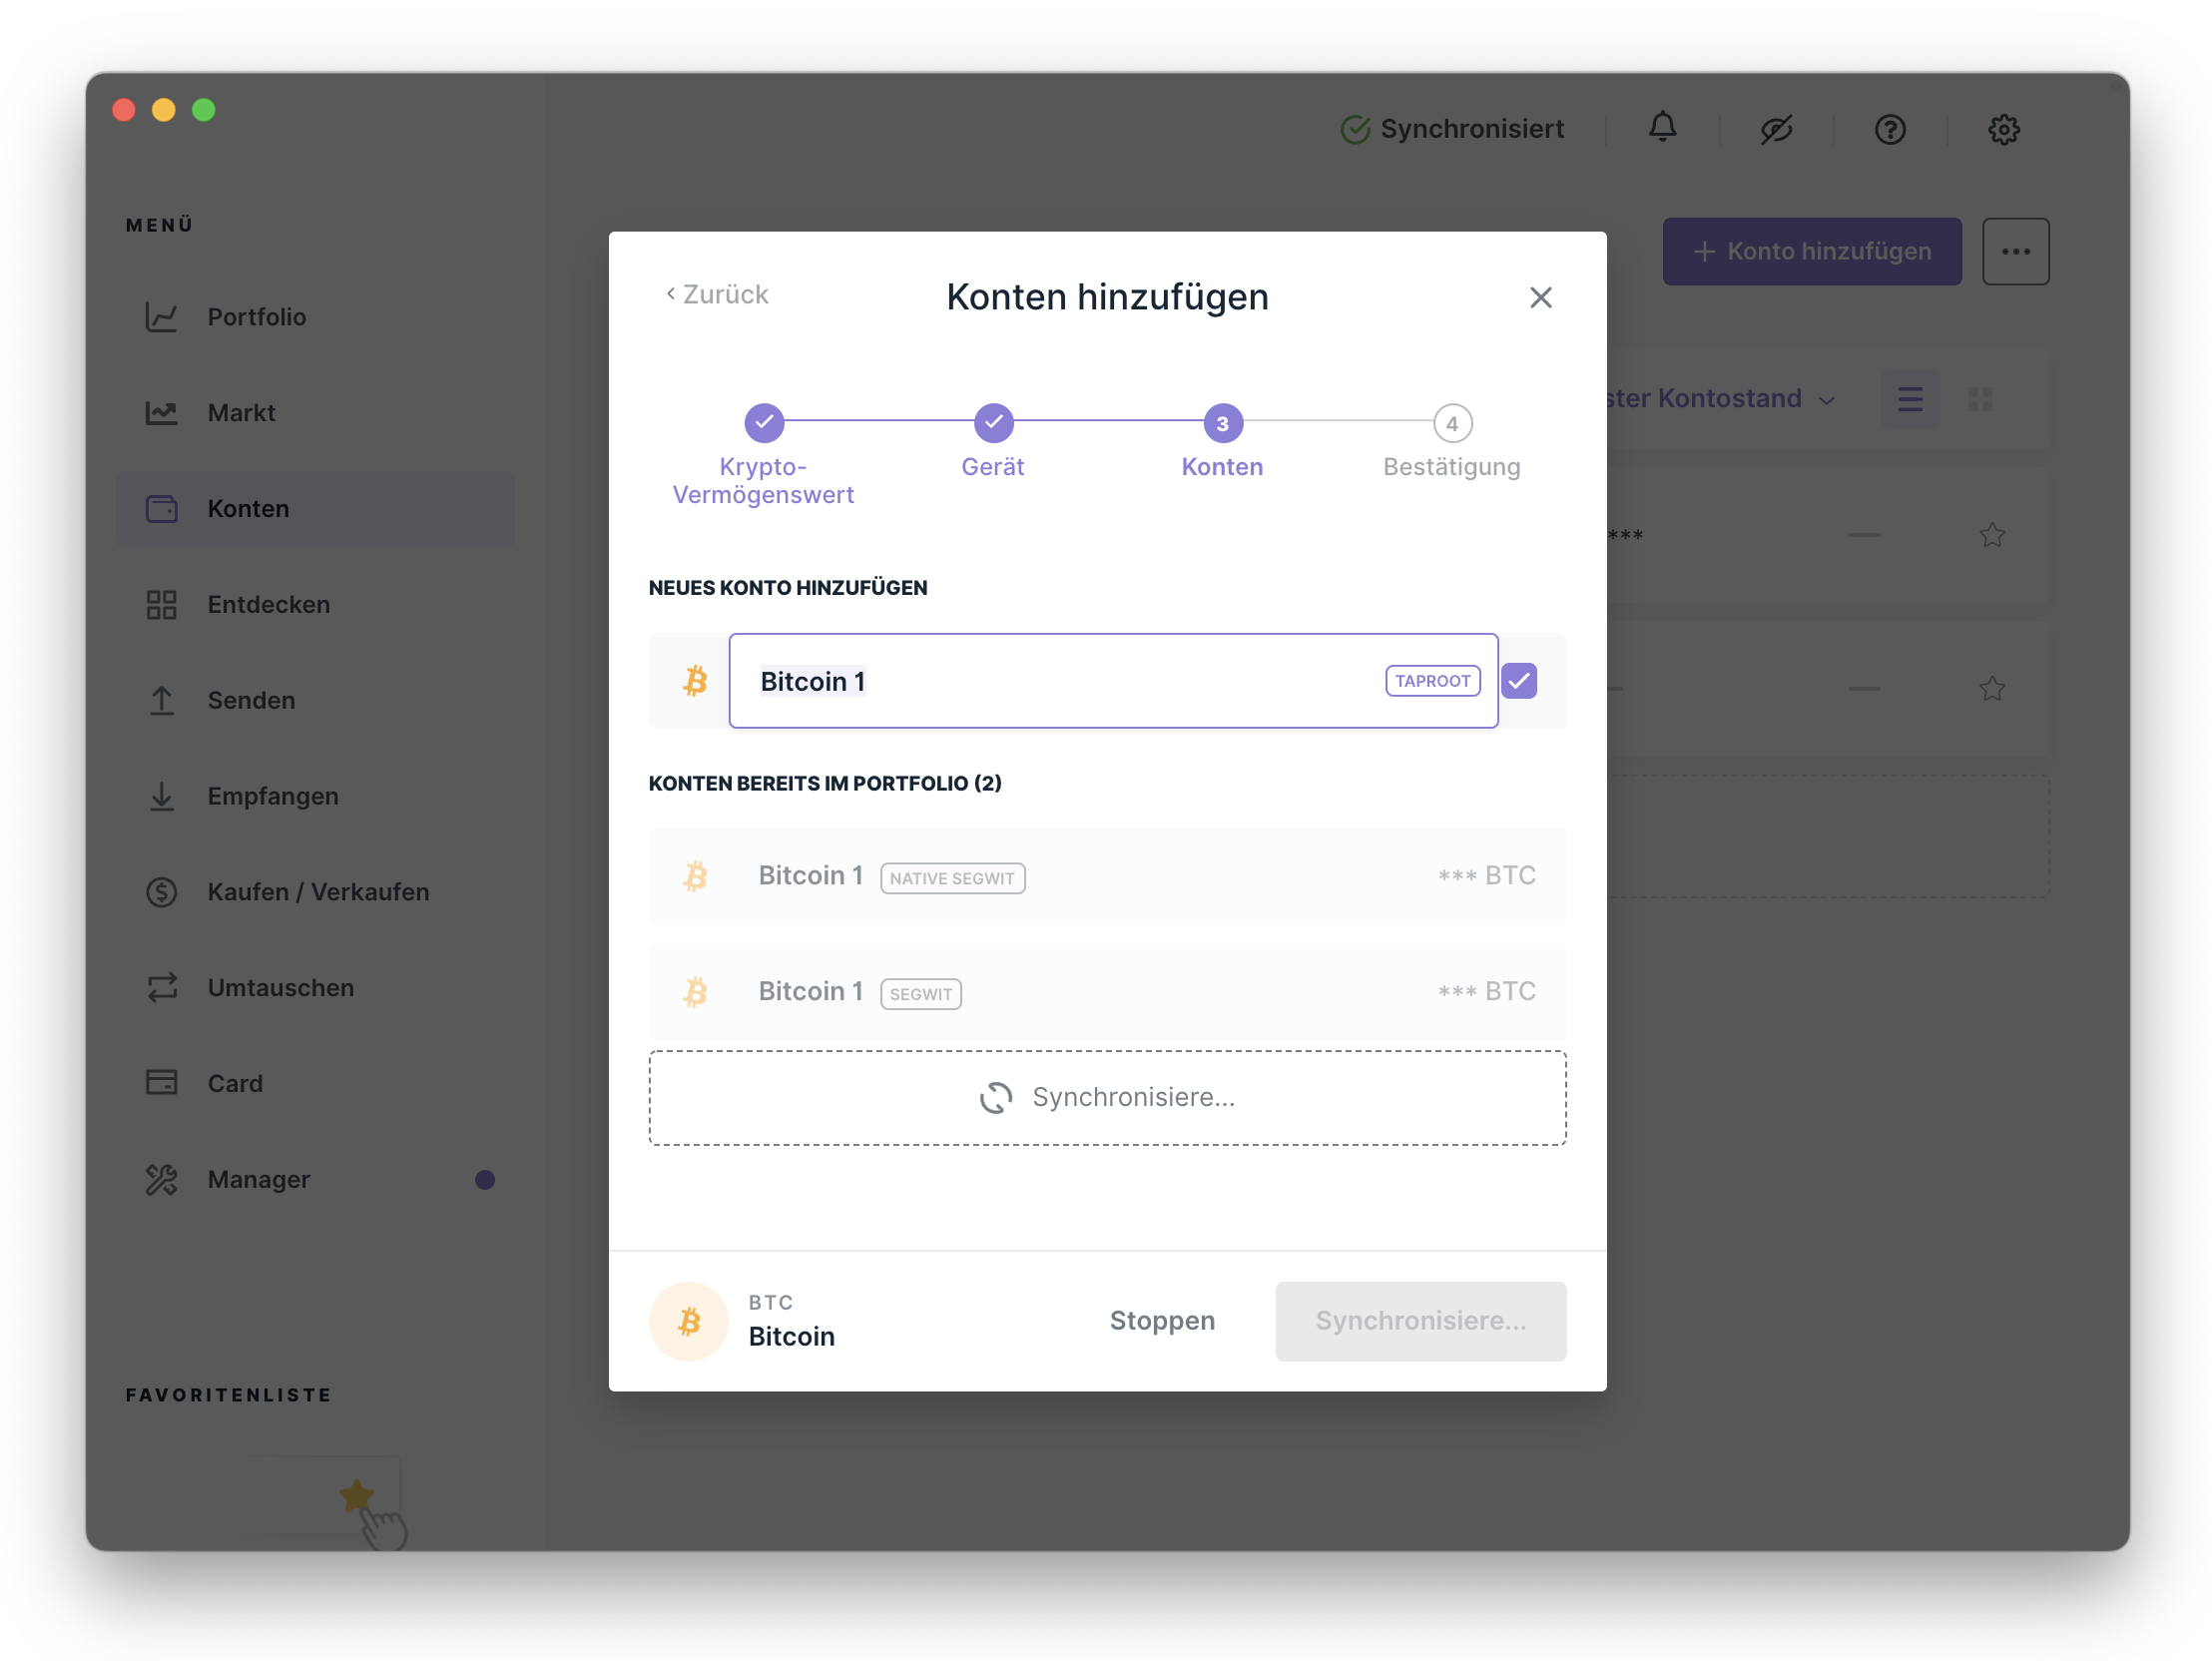
- Enable Show all address types, select Segwit or Native Segwit, and name the account. Taproot addresses are not supported yet. Then click Add account.
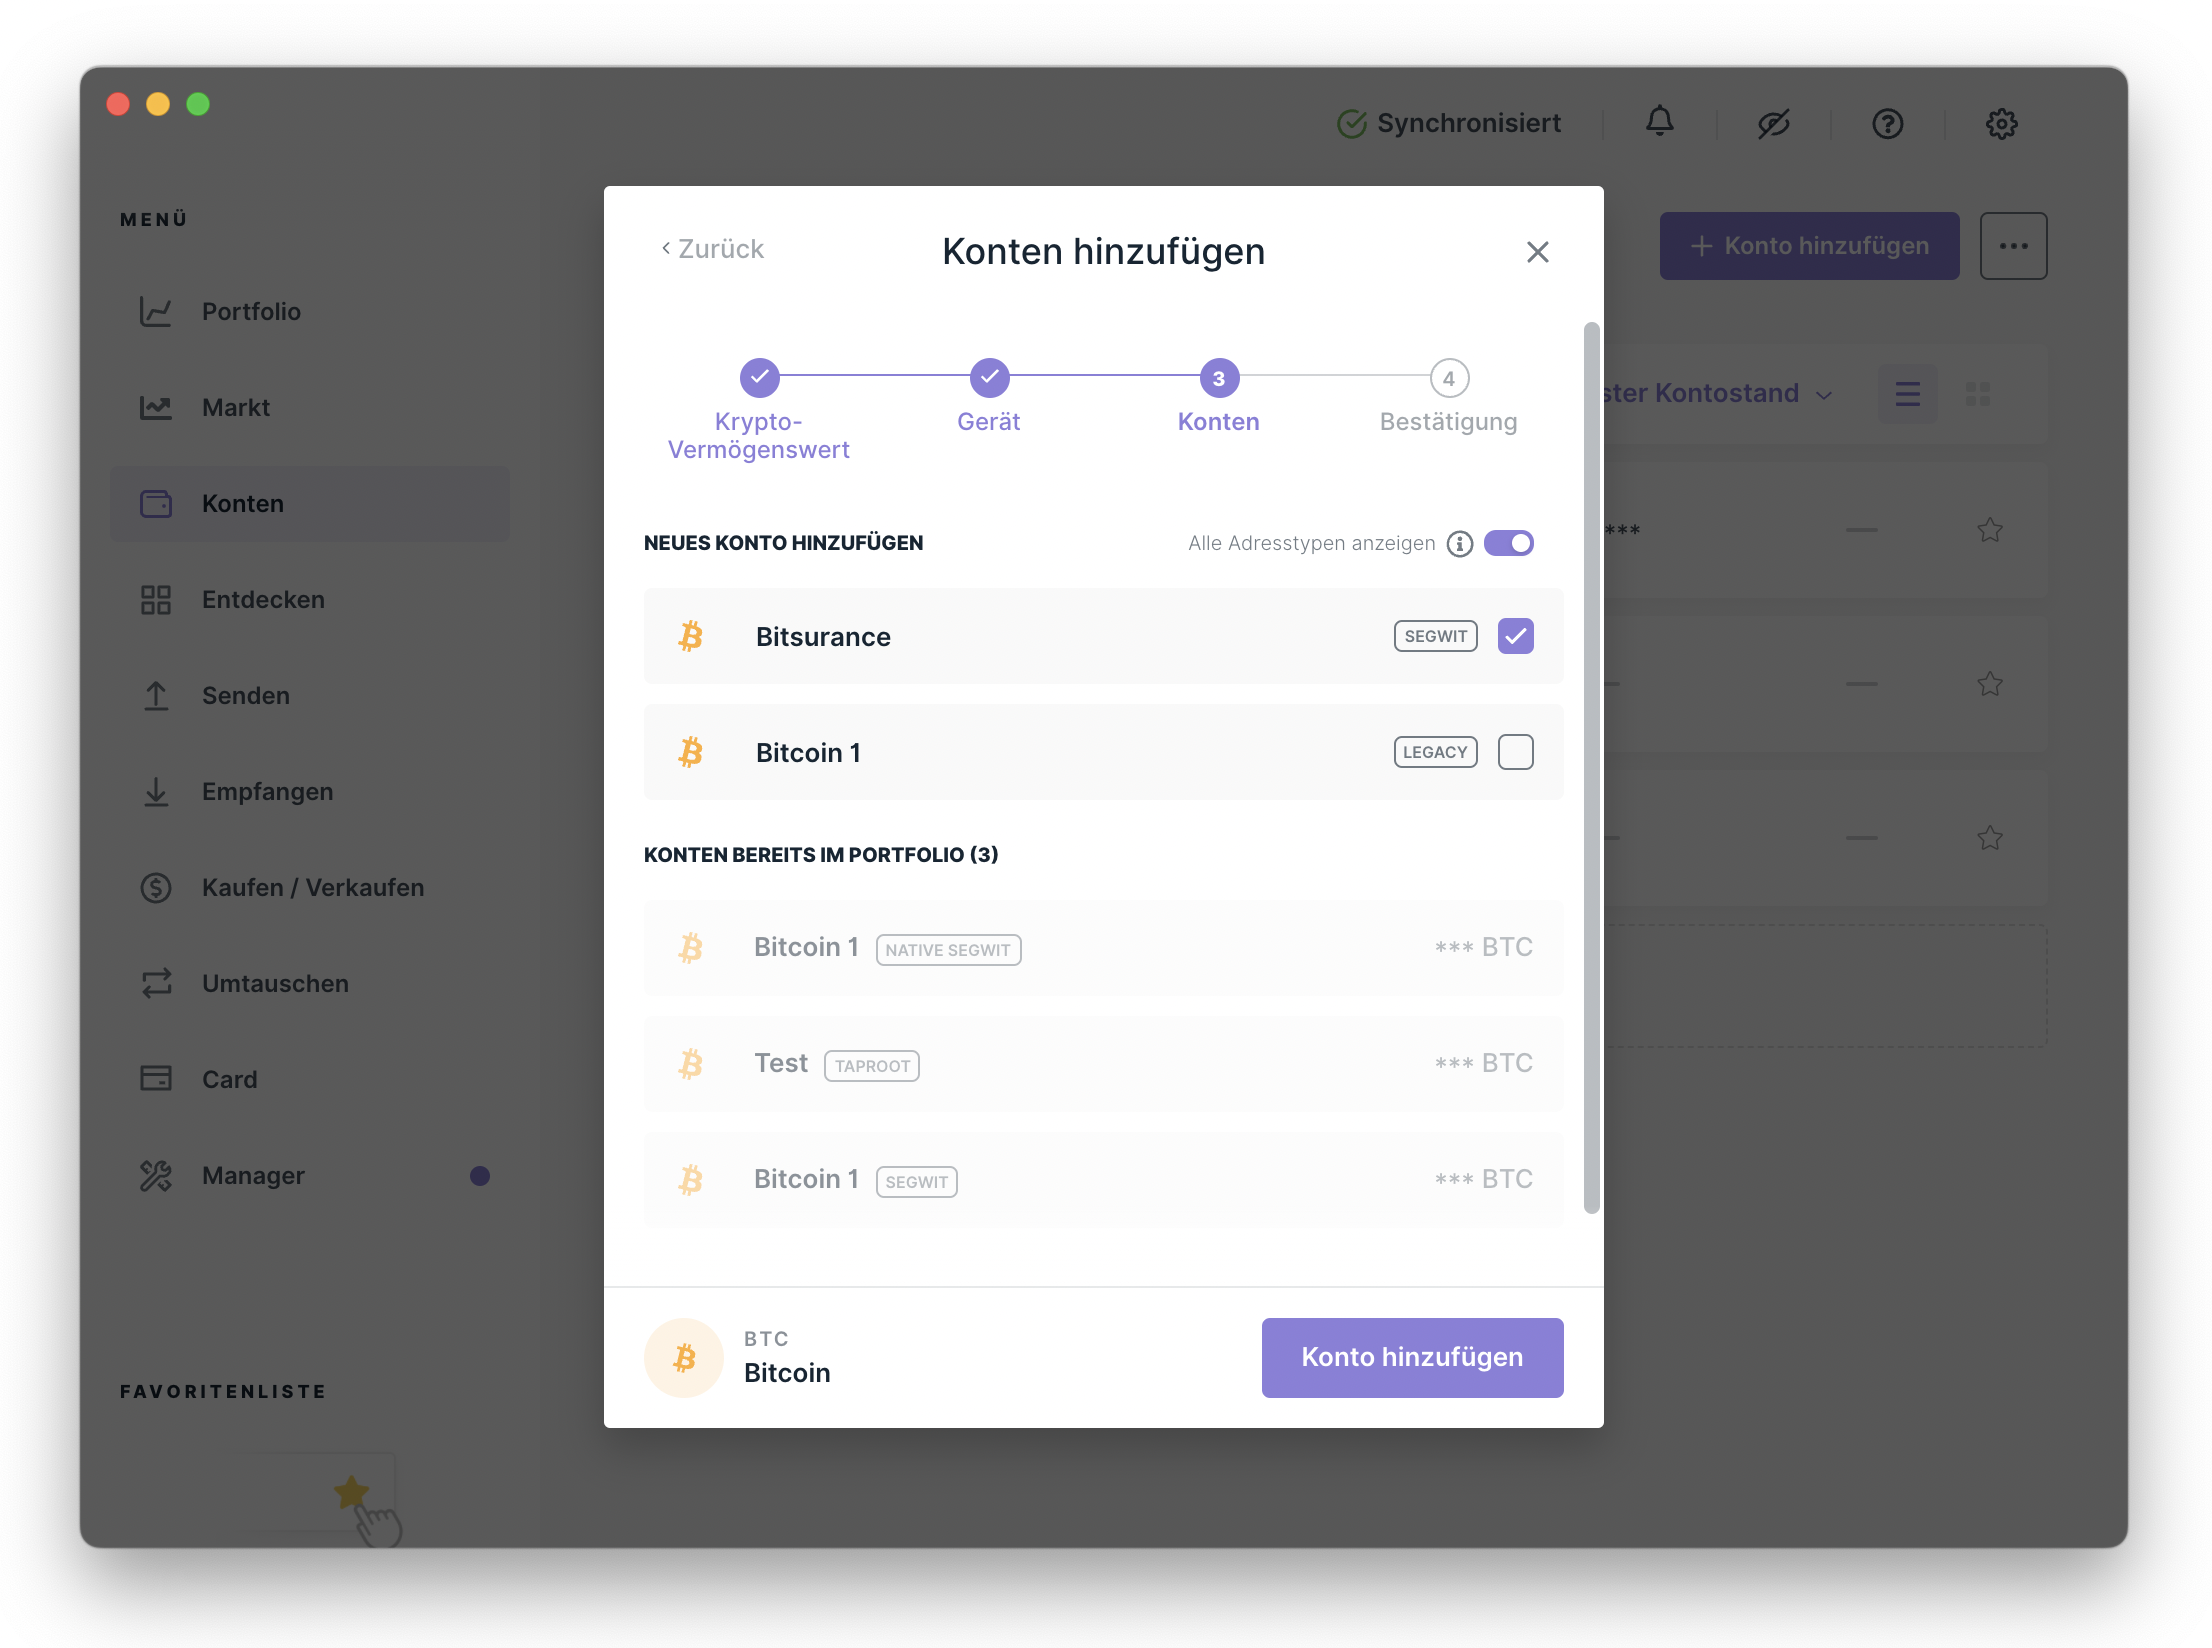
Use Segwit or Native Segwit and choose a clear account name.
- The account has been added successfully and is now shown under Accounts.
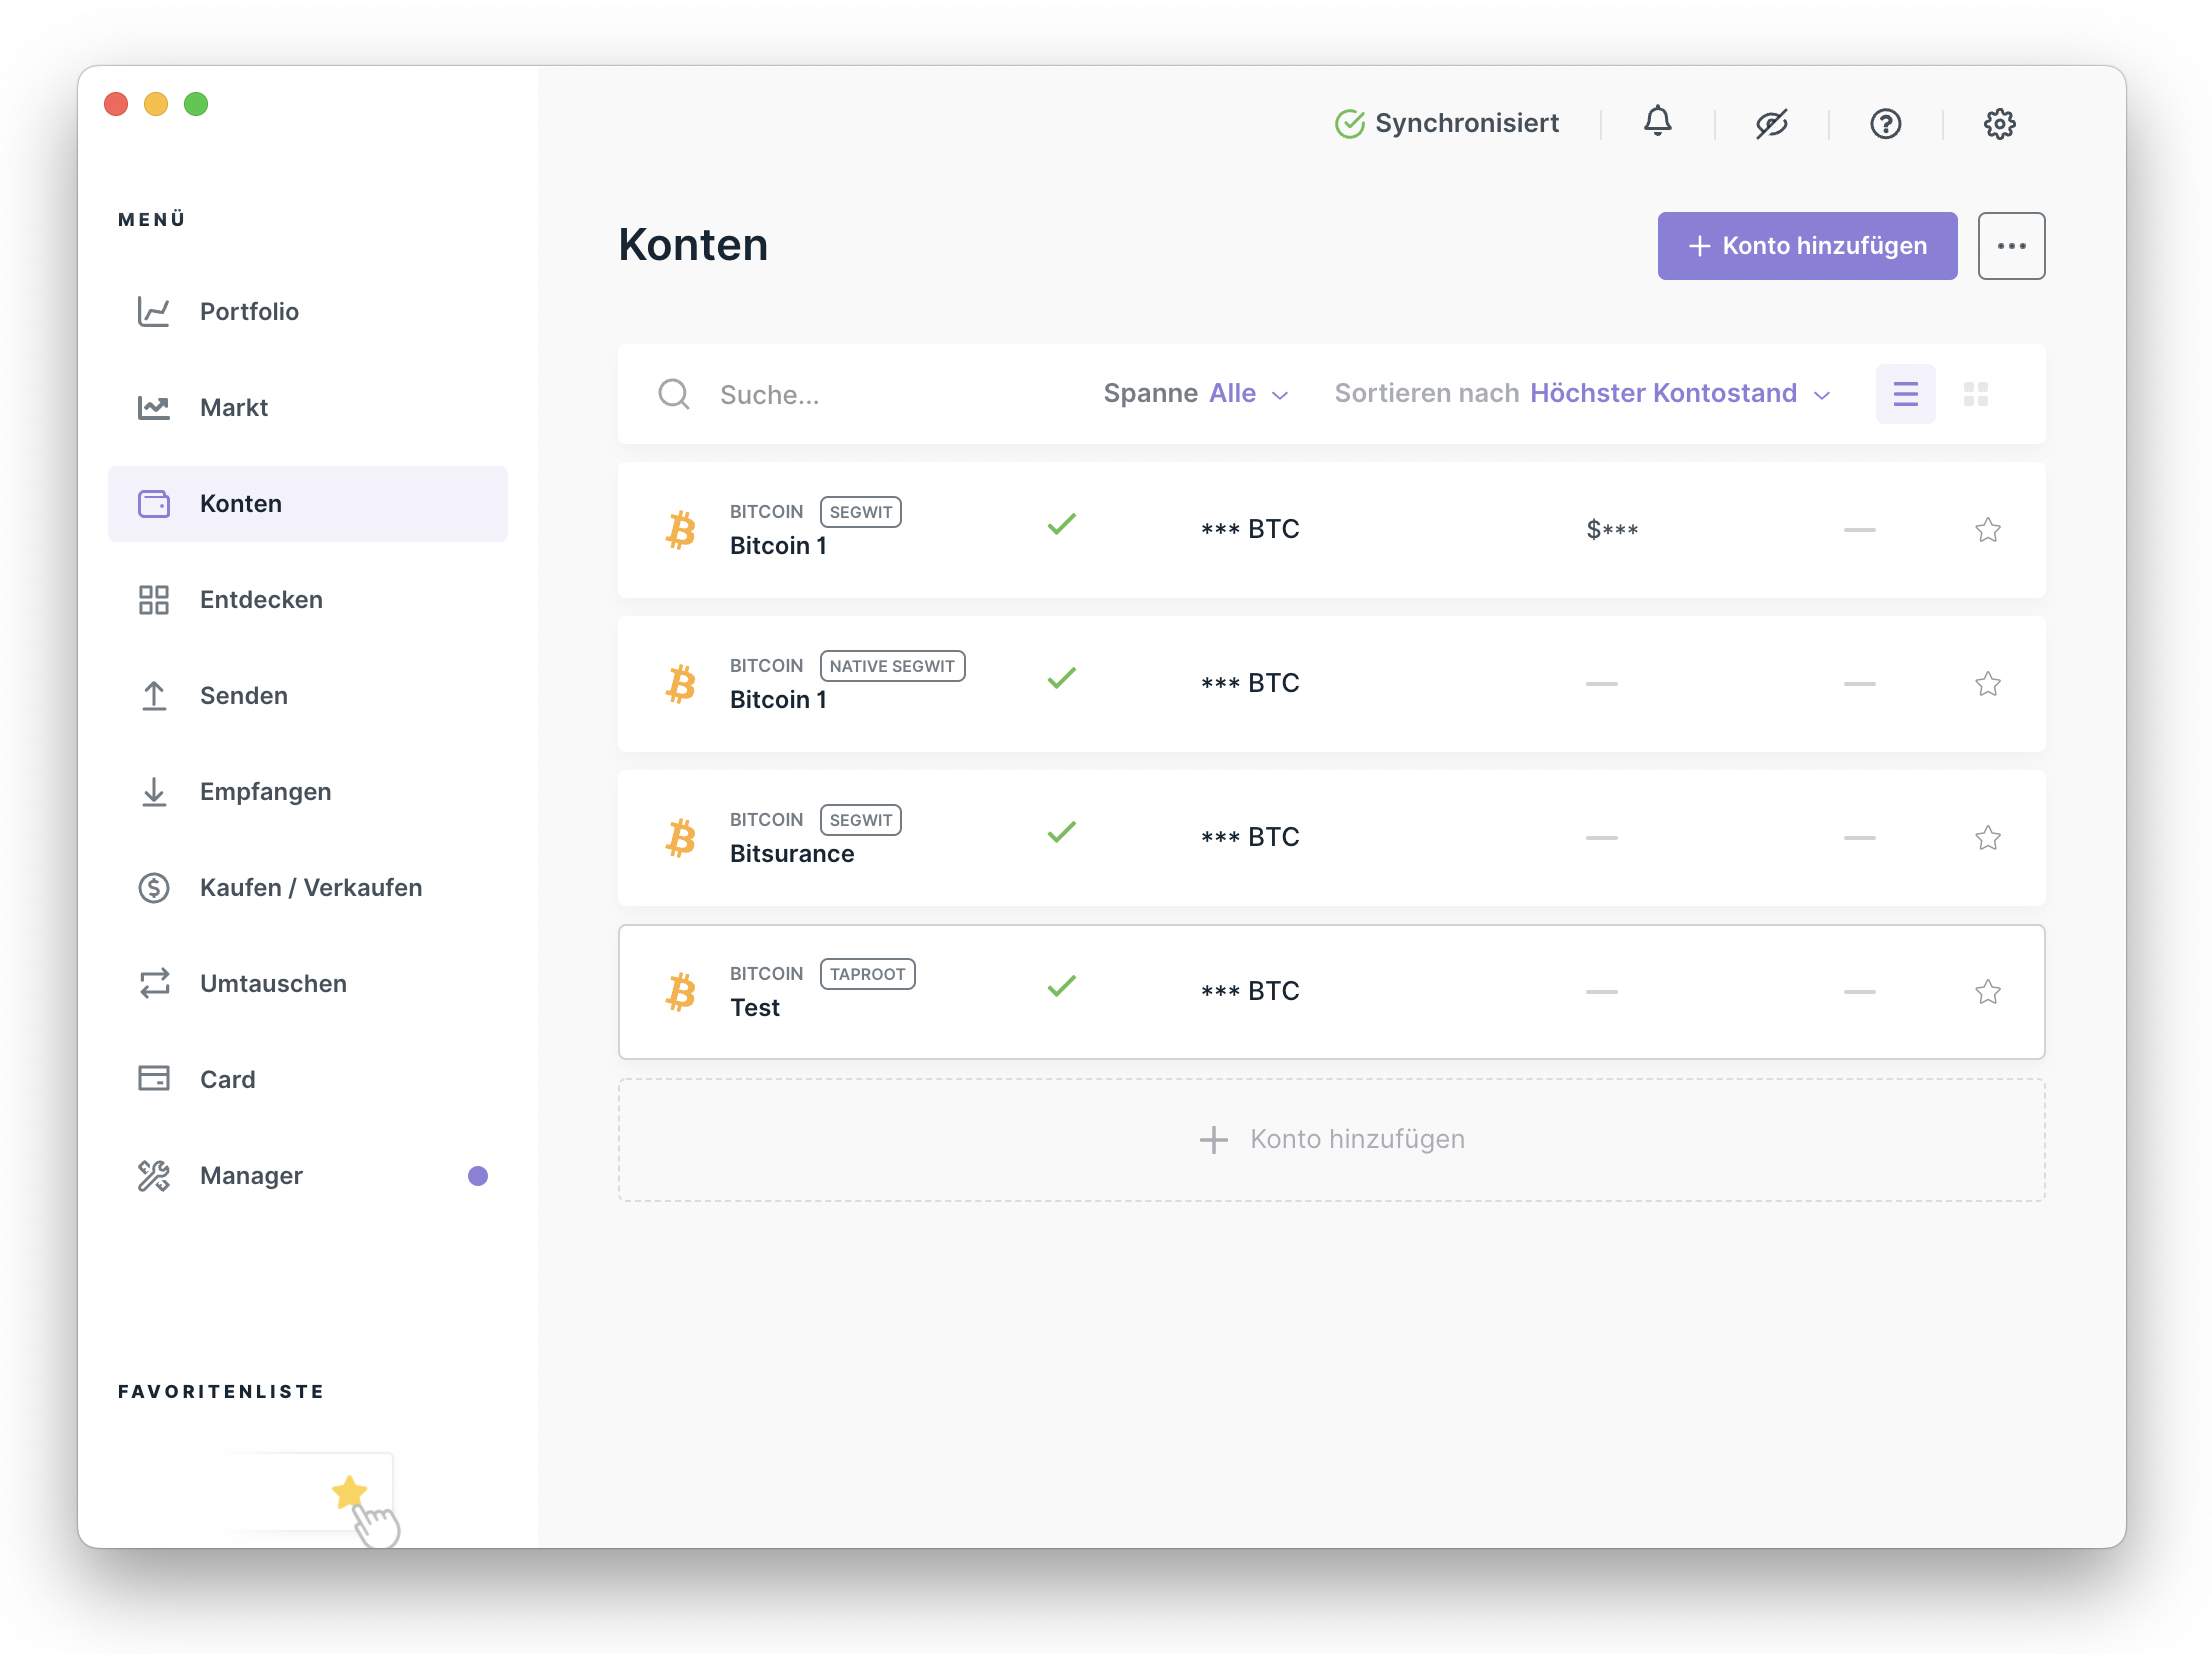
The additional account is now ready to use.
To receive Bitcoin on this account, select the new account, create a receiving address, and send your coins to that address.